How-To: Get Started with Uno.Extensions
Uno.Extensions is a series of NuGet packages designed to encapsulate common developer tasks associated with building multi-platform mobile, desktop and web applications using the Uno platform.
The Uno.Extensions follows the Microsoft.Extensions model that creates a host environment where you can register additional dependencies. The registered dependencies are then available throughout the application via Services (IServiceProvider) property on the IHost instance.
For a more specific description of the functionality included in each referenced package—such as Configuration, Logging, Navigation, and Reactive—refer to the relevant Uno.Extensions documentation.
In addition to referencing Uno, the Guidance Template also references the following packages.
| Package | |
|---|---|
| Uno.Extensions.Hosting | Initializes the hosting environment, including initialising the dependency container |
| Uno.Extensions.Configuration | Loads configuration information from various sources |
| Uno.Extensions.Logging | Configures application logging |
| Uno.Extensions.Navigation | Routing framework for navigation |
| Uno.Extensions.Reactive | Development framework for reactive applications |
| Uno.Extensions.Localization | Provides access to localizable resources |
| Uno.Extensions.Serialization | Helpers for json serialization |
| Uno.Extensions.Http | Configures native http handlers and register endpoints |
This tutorial will walk through how to create an Uno application with the dotnet new tool, that is already configured to use the Uno.Extensions.
Step-by-steps
1. Installing extension templates
The dotnet templates included in the Uno.Extensions.Templates package are used to easily create new projects that already reference the Uno.Extensions.
Open a command prompt and run the following
dotnet new -i Uno.Extensions.TemplatesNavigate to the desired projects directory, and use the
unoapp-extensionstemplate to generate the starter solution discussed abovedotnet new unoapp-extensions -o MyProjectNameThe argument specified after the
-oflag (i.e. MyProjectName) will act as the name for both a containing directory and the generated solution.Open the solution in Visual Studio
.\MyProjectName\MyProjectName.sln
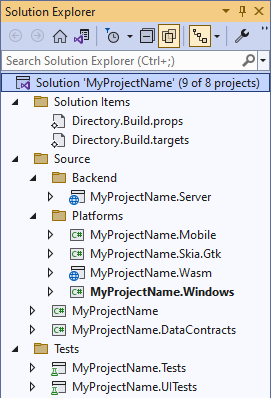
2. Exploring the Solution
The generated solution will contain:
MyProjectName - for application logic, and other constructs like view models and services that are independent of the UI of the application.
MyProjectName.UI - for controls, pages, and views comprising the app’s UI layer.
Platforms/MyProjectName.* - platform-specific projects for each supported platform.
MyProjectName.Tests and MyProjectName.UI.Tests - for writing unit and UI tests respectively.
3. Running the Application
Select a target from the drop-down as pictured below
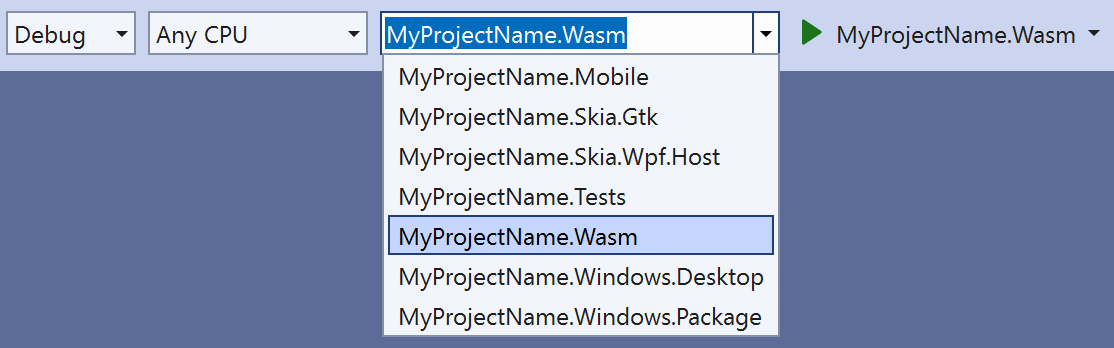
Click the “play” button, or press F5 to start debugging. The necessary projects in the solution will be compiled and deployed based on the target platform.
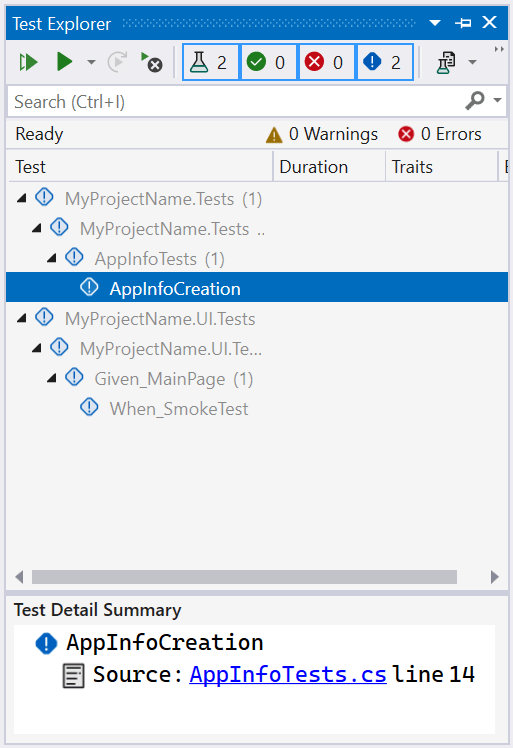
4. Running the Unit Tests
Right click the project inside Tests\MyProjectName.Tests to open the context menu
Select Run Tests
The application will be compiled and the test cases will run.
Tip
If the 'Run Tests' menu item doesn't exist, you need to Rebuild the solution to get Visual Studio to detect the available tests.
5. Running the UI tests
Right click the MyProjectName.Wasm project to open the context menu
Select Set as startup project
Press Ctrl + F5 to start the WASM project without debugging.
Once the application is compiled, it will launch inside your default browser. Take note of the URL which should look something like this: https://localhost:11111/
Find the project Tests\MyProjectName.UI.Tests and locate the Constants.cs file
Open Constants.cs and update the WebAssemblyDefaultUri constant
It should appear similar to this:
public readonly static string WebAssemblyDefaultUri = "https://localhost:11111/";Go back to the project Tests\MyProjectName.UI.Tests and right click. Then, Run Tests