Get Started on Visual Studio 2022
This getting started will guide you through setting up your environment to create Uno Platform applications using C# and .NET with Visual Studio 2022.
Tip
If you want to use another environment or IDE, see our general getting started.
Install Visual Studio with Workloads
To create Uno Platform applications you will need Visual Studio 2022 17.8 or later:
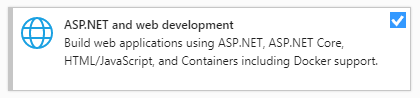
ASP.NET and web development workload installed (for WebAssembly development)
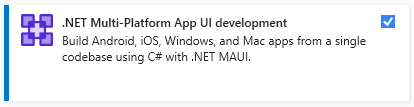
.NET Multi-platform App UI development workload installed (for iOS, Android, Mac Catalyst development).
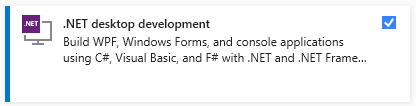
.NET desktop development workload installed (for Skia-based targets development)
Important
Uno Platform 5.0 does not support Xamarin projects anymore. To build Xamarin-based projects in Visual Studio 2022, in Visual Studio's installer Individual components tab, search for Xamarin and select Xamarin and Xamarin Remoted Simulator. See this section on migrating Xamarin projects to .NET 6.
Check your environment
Open a command-line prompt, Windows Terminal if you have it installed, or else Command Prompt or Windows Powershell from the Start menu.
Setup uno.check by:
Installing the tool:
dotnet tool install -g uno.checkUpdating the tool, if you previously installed it:
dotnet tool update -g uno.check
Run the tool from the command prompt with the following command:
uno-checkFollow the instructions indicated by the tool.
Install the Uno Platform Extension
Launch Visual Studio 2022, then click
Continue without code. ClickExtensions->Manage Extensionsfrom the Menu Bar.
In the Extension Manager expand the Online node and search for
Uno, install theUno Platformextension or download it from the Visual Studio Marketplace, then restart Visual Studio.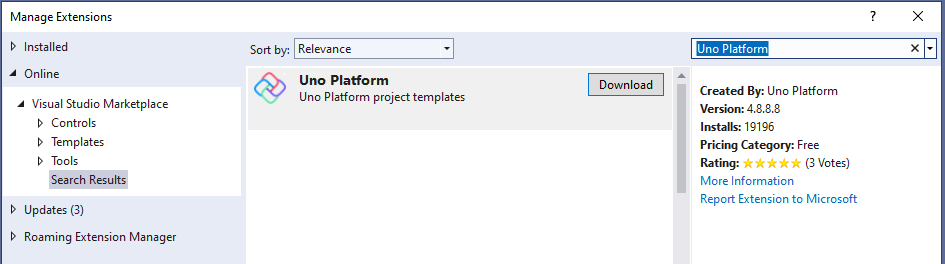
Additional Setup for Windows Subsystem for Linux (WSL)
It is possible to build and debug Skia+GTK projects under WSL, if you choose to do so.
To setup your environment for WSL:
- Install WSL Ubuntu 22.04 or later
- Install the prerequisites for Linux mentioned below, in your installed distribution using the Ubuntu shell
Note
Running Uno Platform apps using WSL makes use of WSLg's support for Wayland.
Additional Setup for Skia+GTK projects
In order to run Skia+GTK heads, you will need to make sure to install the GTK3 runtime.
Tip
Once the GTK3 runtime is installed, you will need restart your IDE for the changes to take effect.
To install on CI using Azure Pipelines, use the following step:
steps:
  - powershell: |
        $source = "https://github.com/tschoonj/GTK-for-Windows-Runtime-Environment-Installer/releases/download/2020-07-15/gtk3-runtime-3.24.20-2020-07-15-ts-win64.exe"
        $destination = "gtk3-runtime.exe"
        Invoke-WebRequest $source -OutFile $destination
        Start-Process -FilePath "gtk3-runtime.exe" -Wait -PassThru -ArgumentList /S
        Write-Host "##vso[task.setvariable variable=PATH;]${env:PATH};C:\Program Files\GTK3-Runtime Win64\bin";

    displayName: Install GTK3 runtime
Next Steps
You're all set! You can create your first Uno Platform app.