Dialogs and errors
The Silverlight TimeEntryRia makes use of ChildWindow controls to display dialog controls such as the LoginForm and ErrorWindow. The equivalent UWP control for these types of dialogs is the ContentDialog.
Tip
Dialog controls are modal UI overlays that provide contextual app information. They block interactions with the app window until being explicitly dismissed. They often request some kind of action from the user. The Microsoft guidelines on dialog controls in UWP can be reviewed below:
The ContentDialog is a flexible control - a dialog box that can be customized to contain checkboxes, hyperlinks, buttons and any other XAML content. It can be created simply from code, or as a new item added to a project with full designer support. However, there is one major limitation:
Warning
There can only be one ContentDialog open per thread at a time. Attempting to open two ContentDialogs will throw an exception, even if they are attempting to open in separate AppWindows.
As the UWP environment supports asynchronous operations, it is possible that different parts of the application may attempt to show ContentDialogs at the same time. Although it is possible that a conflict will not occur during development and testing, production issues are always possible. To prevent this, it is recommended that a manager is used to ensure only one instance is displayed at any one time, and other instances are queued displayed in turn.
Creating a dialog manager
In this task, a DialogManager class will be created. The DialogManager uses the SemaphoreSlim class to ensure that only one show function at a time is executing.
In the Shared project, within the Helpers folder, create a new class and name it DialogManager.
Update the using statements as follows:
using System;
using System.Threading;
using System.Threading.Tasks;
Update the class definition as follows:
internal static class DialogManager
{
}
To ensure only one dialog is displayed at a time, add the following member variable:
private static readonly SemaphoreSlim _oneAtATimeAsync = new SemaphoreSlim(1, 1);This variable makes use of the SemaphoreSlim class. This class is used to limit the number of threads that can access a resource. The constructor used specifies the minimum and maximum number of request to access a resource can be granted - in this case, just one.
Finally, add the actual method that performs the work:
internal static async Task<T> OneAtATimeAsync<T>(Func<Task<T>> show, TimeSpan? timeout, CancellationToken? token)
{
    var to = timeout ?? TimeSpan.FromHours(1);
    var tk = token ?? new CancellationToken(false);
    if (!await _oneAtATimeAsync.WaitAsync(to, tk))
    {
        throw new Exception($"{nameof(DialogManager)}.{nameof(OneAtATimeAsync)} has timed out.");
    }
    try
    {
        return await show();
    }
    finally
    {
        _oneAtATimeAsync.Release();
    }
}
Review the method declaration; there are three arguments:
- show - this is the method that will be called to display the ContentDialog.
- timeout - null or how long to wait for the earlier dialogs to close before giving up and throwing an exception
- token - null or a cancellation token that communicates whether to cancel waiting to show the dialog
If no values are supplied for timeout or token, suitable default values are supplied.
The code then waits until the SemaphoreSlim is available (WaitAsync returns true), or either the timeout to is reached, or the token tk is cancelled (WaitAsync returns false).
If the SemaphoreSlim is entered, the show method is executed, otherwise an exception is thrown.
Using the
finallycode, the SemaphoreSlim is released to allow the next dialog to be shown.Tip
You can learn more about how the CancellationToken struct is used to notify an asynchronous task that it should be canceled below:
The next task introduces a series of extensions that assist with showing and configuring a ContentDialog.
Dialog extensions
The following steps will walk through the creation of some extensions that simplify the use of the ContentDialog with the DialogManager.
In the Shared project, within the Helpers folder, create a new class and name it DialogExtensions.
Update the using statements as follows:
using System;
using System.Threading;
using System.Threading.Tasks;
using Windows.Foundation;
using Windows.UI.Xaml.Controls;
Update the class definition as follows:
internal static class DialogExtensions
{
}
To add an extension method that ensures one ContentDialog is shown at a time, add the following:
internal static async Task<ContentDialogResult> ShowOneAtATimeAsync(
    this ContentDialog dialog,
    TimeSpan? timeout = null,
    CancellationToken? token = null)
{
    return await DialogManager.OneAtATimeAsync(async () => await dialog.ShowAsync(), timeout, token);
}
This extension method simplifies the use of the DialogManager. Here is an example:
var errorDialog = new ContentDialog
{
    Title = ErrorMessageHelper.GetErrorMessageResource(titleResourceKey),
    Content = ErrorMessageHelper.GetErrorMessageResource(contentResourceKey)
}.SetPrimaryButton(ErrorMessageHelper.GetErrorMessageResource(isFatal ? "ExitApp" : "Ok"));

await errorDialog.ShowOneAtATimeAsync();
First the dialog is created, then the extension method is used to display it.
In order to simplify the configuration of the ContentDialog primary and secondary buttons, add the following extensions methods:
internal static ContentDialog SetPrimaryButton(this ContentDialog dialog, string text)
{
    dialog.PrimaryButtonText = text;
    dialog.IsPrimaryButtonEnabled = true;
    return dialog;
}

internal static ContentDialog SetCloseButton(this ContentDialog dialog, string text)
{
    dialog.CloseButtonText = text;
    return dialog;
}

internal static ContentDialog SetPrimaryButton(this ContentDialog dialog, string text,
    TypedEventHandler<ContentDialog, ContentDialogButtonClickEventArgs> clickHandler)
{
    dialog.SetPrimaryButton(text);
    dialog.PrimaryButtonClick += clickHandler;
    return dialog;
}

internal static ContentDialog SetSecondaryButton(this ContentDialog dialog, string text)
{
    dialog.SecondaryButtonText = text;
    dialog.IsSecondaryButtonEnabled = true;
    return dialog;
}

internal static ContentDialog SetSecondaryButton(this ContentDialog dialog, string text,
    TypedEventHandler<ContentDialog, ContentDialogButtonClickEventArgs> clickHandler)
{
    dialog.SetSecondaryButton(text);
    dialog.SecondaryButtonClick += clickHandler;
    return dialog;
}
As an example of configuring the primary button text using the SetPrimaryButton:
var errorDialog = new ContentDialog
{
    Title = ErrorMessageHelper.GetErrorMessageResource(titleResourceKey),
    Content = ErrorMessageHelper.GetErrorMessageResource(contentResourceKey)
}.SetPrimaryButton(ErrorMessageHelper.GetErrorMessageResource(isFatal ? "ExitApp" : "Ok"));

await errorDialog.ShowOneAtATimeAsync();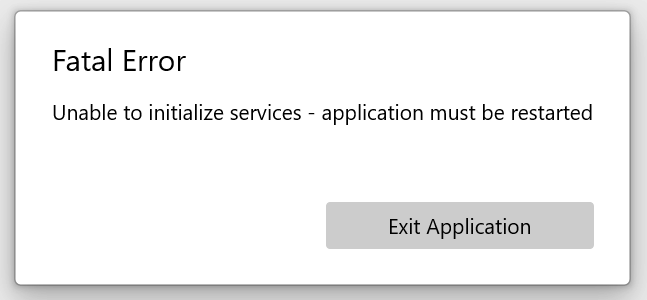
Simplifying the display of error dialogs
An unfortunate fact of development is that there is often the need to display warnings, errors and sometimes critical errors to the user. By combining the classes above and an additional helper, the challenge of displaying only one dialog at a time, using string resources, and ensuring it is created on the correct thread, can be simplified. Additionally, in the circumstance where a fatal error has occurred where the app is likely to be unstable, the app can be shutdown, if UWP, or the app content replaced with a simple error message informing the user to restart.
In the Shared project, within the Helpers folder, create a new class and name it ErrorDialogHelper.
Update the using statements as follows:
using System;
using System.Threading;
using System.Threading.Tasks;
using Windows.Foundation;
using Windows.UI.Xaml.Controls;
Update the class definition as follows:
internal static class ErrorDialogHelper
{
}
To add a method to display a warning or error, add the following method:
internal static async Task ShowErrorAsync(string titleResourceKey, string contentResourceKey)
{
    await CoreApplication.MainView.Dispatcher.RunAsync(Windows.UI.Core.CoreDispatcherPriority.Normal, async () =>
    {
        var errorWindow = new ContentDialog
        {
            Title = ErrorMessageHelper.GetErrorMessageResource(titleResourceKey),
            Content = ErrorMessageHelper.GetErrorMessageResource(contentResourceKey)
        }.SetPrimaryButton(ErrorMessageHelper.GetErrorMessageResource("Ok"));
        await errorWindow.ShowOneAtATimeAsync();
    });
}
Notice that this method uses the Dispatcher to ensure the ContentDialog is instantiated and displayed correctly - an exception is throw if the ContentDialog is created on the wrong thread.
To add a method that displays a fatal error and either displays an error page or closes the app, add the following code:
    internal static async Task ShowFatalErrorAsync<TErrorPage>(string titleResourceKey, string contentResourceKey)
    where TErrorPage : Page, new()
    {
        await CoreApplication.MainView.Dispatcher.RunAsync(Windows.UI.Core.CoreDispatcherPriority.Normal, async () =>
            {
                var errorDialog = new ContentDialog
                {
                    Title = ErrorMessageHelper.GetErrorMessageResource(titleResourceKey),
                    Content = ErrorMessageHelper.GetErrorMessageResource(contentResourceKey)
                }.SetPrimaryButton(ErrorMessageHelper.GetErrorMessageResource("ExitApp"));
                await errorDialog.ShowOneAtATimeAsync();

                // if the error is fatal, then the app should either be closed, or disabled
#if __WASM__
                Window.Current.Content = new TErrorPage();
#else
                Application.Current.Exit();
#endif
            });
    }
Here is an example of the fatal error in use:
var tokenTask = TokenService.Instance;
tokenTask.Initialization.ContinueWith(
    async ct =>
    {
        this.Log().LogCritical($"Unable to initialize token service - {ct.Exception.Message}");
        await ErrorDialogHelper.ShowFatalErrorAsync<FatalErrorPage>("FatalErrorTitle", "FatalInitializeError");
    },
    TaskContinuationOptions.OnlyOnFaulted);
In the code above, an essential service is being initialized. Should the initialize fail, the error is logged and then the fatal error dialog is shown.
Note
The Uno platform provides comprehensive support for logging - the article below provides the details on how to configure and use logging:
Next unit: Data access overview