Uno Islands
With Uno Islands, you can host Uno Platform XAML controls in an WPF application, next to existing WPF content. This feature enables you to enhance the look, feel, and functionality of your existing WPF application with the latest Windows UI features provided by their implementation within Uno Platform.
How to use Uno Islands with existing WPF app
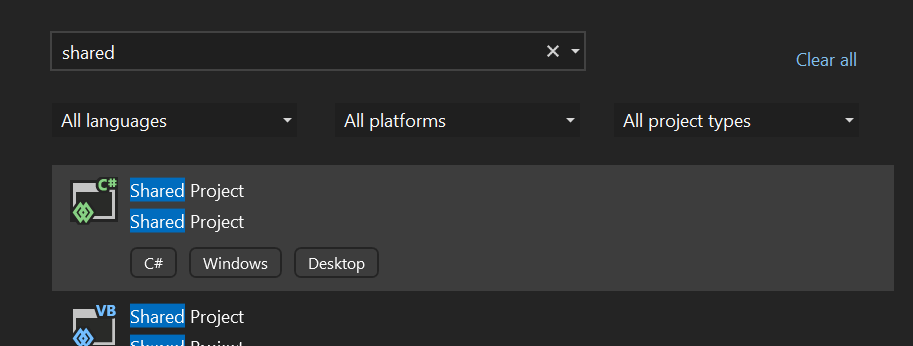
The most common scenario is to add Uno Islands into an existing WPF app. First, add a Shared project into your WPF app solution by right-clicking the solution node in Solution explorer and choosing Add -> New Project... and searching for "Shared Project" in the dialog. This project will be used to host our Uno Platform XAML files.
Shared project contents
In this project, we need to add the Uno Islands Application and a page to be displayed. The easiest way to do this is to copy these files from UnoIslandsSamplesApp in Uno.Samples GitHub repository. Copy and include App.xaml, App.xaml.cs, MainPage.xaml, and MainPage.xaml.cs files in the shared project, and the Assets folder to include the Uno Platform icon font.
Updating the WPF application project
To light-up the Uno Islands feature, we need to reference several Uno Platform NuGet packages, reference the shared project, and include the Uno Platform icon font. Double-click the WPF project and add the following:
<ItemGroup>
    <PackageReference Include="Microsoft.Extensions.Logging" Version="9.0.1" />
    <PackageReference Include="Microsoft.Extensions.Logging.Console" Version="9.0.1" />
    <PackageReference Include="Uno.WinUI.Skia.Wpf" Version="5.6.33" />
    <PackageReference Include="Uno.WinUI.DevServer" Version="5.6.33" Condition="'$(Configuration)'=='Debug'" />
    <PackageReference Include="Uno.UI.Adapter.Microsoft.Extensions.Logging" Version="5.6.33" />
    <PackageReference Include="Uno.WinUI.XamlHost" Version="5.6.33" />
    <PackageReference Include="Uno.WinUI.XamlHost.Skia.Wpf" Version="5.6.33" />
</ItemGroup>
<ItemGroup>
    <UpToDateCheckInput Include="..\UnoIslandsSampleApp.Shared\**\*.xaml" />
</ItemGroup>
<ItemGroup>
    <Content Include="Assets\Fonts\uno-fluentui-assets.ttf" />
</ItemGroup>

<Import Project="..\UnoIslandsSampleApp.Shared\UnoIslandsSampleApp.Shared.projitems" Label="Shared" />
Adding an Uno Island
Now we can add an Uno Island into our WPF app content. Open a WPF XAML file and add the following namespace declaration to the root element:
xmlns:xamlHost="clr-namespace:Uno.UI.XamlHost.Skia.Wpf;
                assembly=Uno.UI.XamlHost.Skia.Wpf"
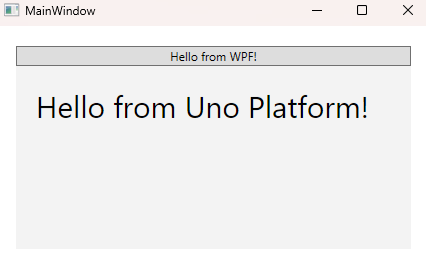
And now use the UnoXamlHost control to host the Uno Platform island:
<Grid Margin="20">
    <Grid.RowDefinitions>
        <RowDefinition Height="Auto" />
        <RowDefinition Height="*" />
    </Grid.RowDefinitions>
    <Button>Hello from WPF!</Button>
    <xamlHost:UnoXamlHost Grid.Row="1"
        InitialTypeName="UnoIslandsSampleApp.MainPage" />
</Grid>
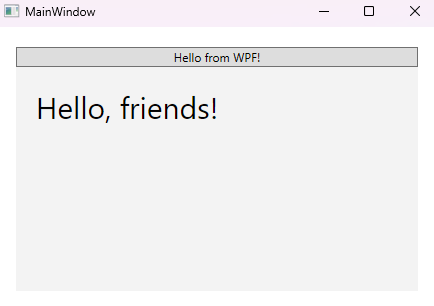
Data-binding
The WPF DataContext is automatically propagated to the Uno Island-hosted controls, which makes it possible to use an MVVM-based approach. Suppose we update the MainWindow.xaml.cs as follows:
public partial class MainWindow : Window
{
    public MainWindow()
    {
        InitializeComponent();
        DataContext = "friends";
    }
}
Now we can use the data in the MainPage.xaml:
<Page
    x:Class="UnoIslandsSampleApp.MainPage"
    xmlns="http://schemas.microsoft.com/winfx/2006/xaml/presentation"
    xmlns:x="http://schemas.microsoft.com/winfx/2006/xaml"
    xmlns:local="using:UnoIslandsSampleApp"
    xmlns:d="http://schemas.microsoft.com/expression/blend/2008"
    xmlns:mc="http://schemas.openxmlformats.org/markup-compatibility/2006"
    mc:Ignorable="d"
    Background="{ThemeResource ApplicationPageBackgroundThemeBrush}">

    <Grid>
        <TextBlock Margin="20" FontSize="30">
            <Run Text="Hello, " /><Run Text="{Binding}" /><Run Text="!" />
        </TextBlock>
    </Grid>
</Page>
How to use Uno Islands in blank Uno app
The starting point for creating an Uno Islands-enabled application is to create a blank Uno Platform app.
Preparing solution
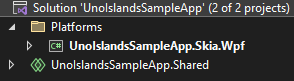
In the new solution, feel free to remove targets that are not needed for your purposes, but make sure to keep at least the Shared project and WPF project.
Right-click the solution node in Solution Explorer and select Manage NuGet Packages for Solution.... In the NuGet Package Manager window, search for Uno.WinUI.XamlHost.
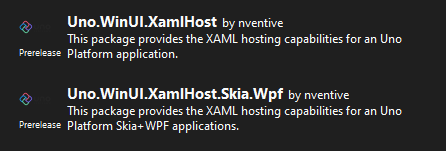
Install the XamlHost package in all projects and the XamlHost.Skia.Wpf package in the WPF project.
Set up XamlApplication
Uno Islands require a special type of Application class to get discovered properly. Open the App.xaml.cs file and make your application derive from Uno.UI.XamlHost.XamlApplication:
public sealed partial class App : Uno.UI.XamlHost.XamlApplication
{
    ...
}
In App.xaml you also need to adjust the root element accordingly:
<xamlHost:XamlApplication
    x:Class="UnoIslandsSampleApp.App"
    xmlns:xamlHost="using:Uno.UI.XamlHost"
    ...>
...
</xamlHost:XamlApplication>
Note that you can create a separate
XamlApplication-derived class for Islands purposes and keep the existingApplicationclass for "full" Uno Application purposes, if you want to develop a self-standing and island-hosted application simultaneously.
Hosting Uno Platform content in WPF app
You can now host any Uno Platform content next to classic WPF content using the Uno.UI.XamlHost.Skia.Wpf.UnoXamlHost control. The InitialTypeName attribute allows you to specify the type that should be loaded in it. For example, we can host the MainPage in MainWindow.xaml as follows:
<Window x:Class="UnoIslandsSampleApp.WPF.Host.MainWindow"
        xmlns="http://schemas.microsoft.com/winfx/2006/xaml/presentation"
        xmlns:x="http://schemas.microsoft.com/winfx/2006/xaml"
        xmlns:d="http://schemas.microsoft.com/expression/blend/2008"
        xmlns:mc="http://schemas.openxmlformats.org/markup-compatibility/2006"
        xmlns:local="clr-namespace:UnoIslandsSampleApp.WPF.Host"
        xmlns:xamlHost="clr-namespace:Uno.UI.XamlHost.Skia.Wpf;assembly=Uno.UI.XamlHost.Skia.Wpf"
        mc:Ignorable="d"
        Title="MainWindow" Height="450" Width="800">
    <Grid Margin="20">
        <Grid.RowDefinitions>
            <RowDefinition Height="Auto" />
            <RowDefinition Height="*" />
        </Grid.RowDefinitions>
        <Button>Hello from WPF!</Button>
        <xamlHost:UnoXamlHost Grid.Row="1" InitialTypeName="UnoIslandsSampleApp.MainPage" />
    </Grid>
</Window>
Make sure to update the MainWindow.xaml.cs as follows to remove the initialization used by full-window Uno apps:
public partial class MainWindow : Window
{
    public MainWindow()
    {
        InitializeComponent();
    }
}
Limitations
This feature is in early preview and some functionality is not enabled yet, including:
- Focus management
- Drag and drop
- Keyboard event handling
See Uno Islands in action
Full working sample application is available in the Uno Samples repository.