Creating an app with Visual Studio
Note
Make sure to setup your environment first by following our instructions.
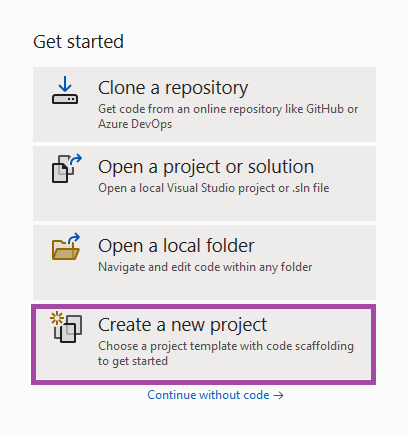
Create the App
To create an Uno Platform app:
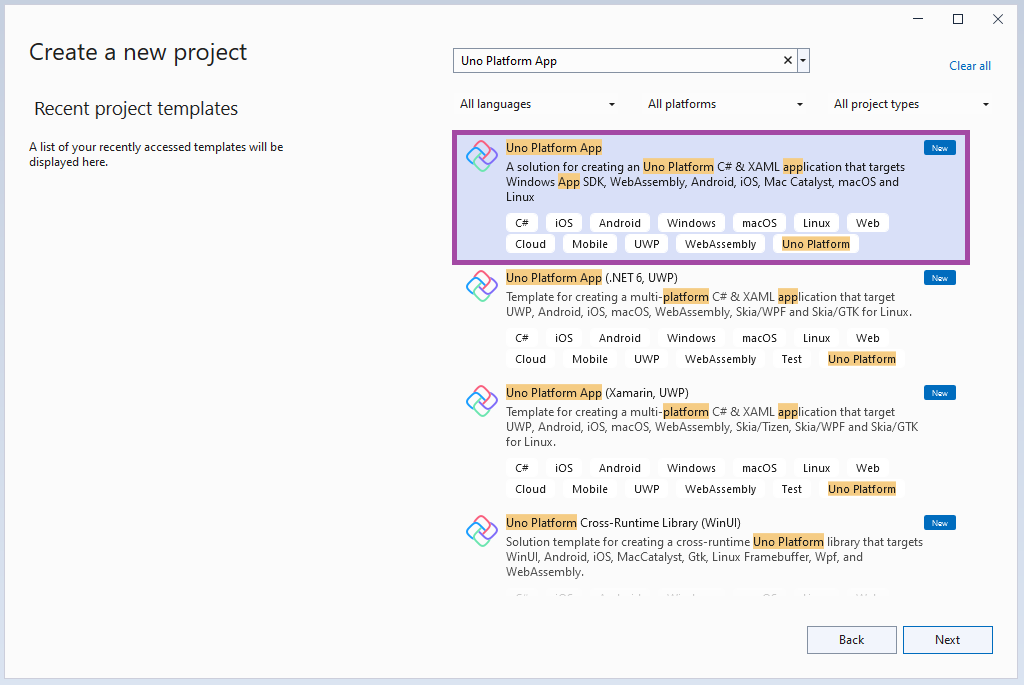
Create a new C# solution using the Uno Platform App template, from Visual Studio's Start Page, then click the Next button
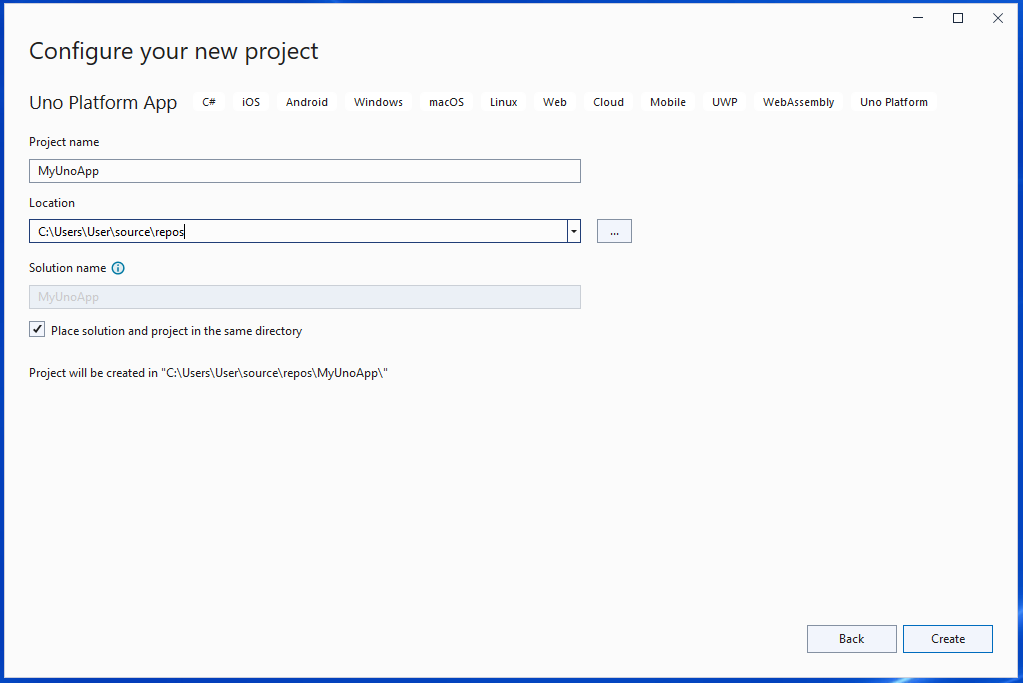
Configure your new project by providing a project name and a location, check the "Place solution and project in the same directory" option, then click the Create button
Note
If you intend to add your new project to an existing solution, continue this guide then follow our instructions.
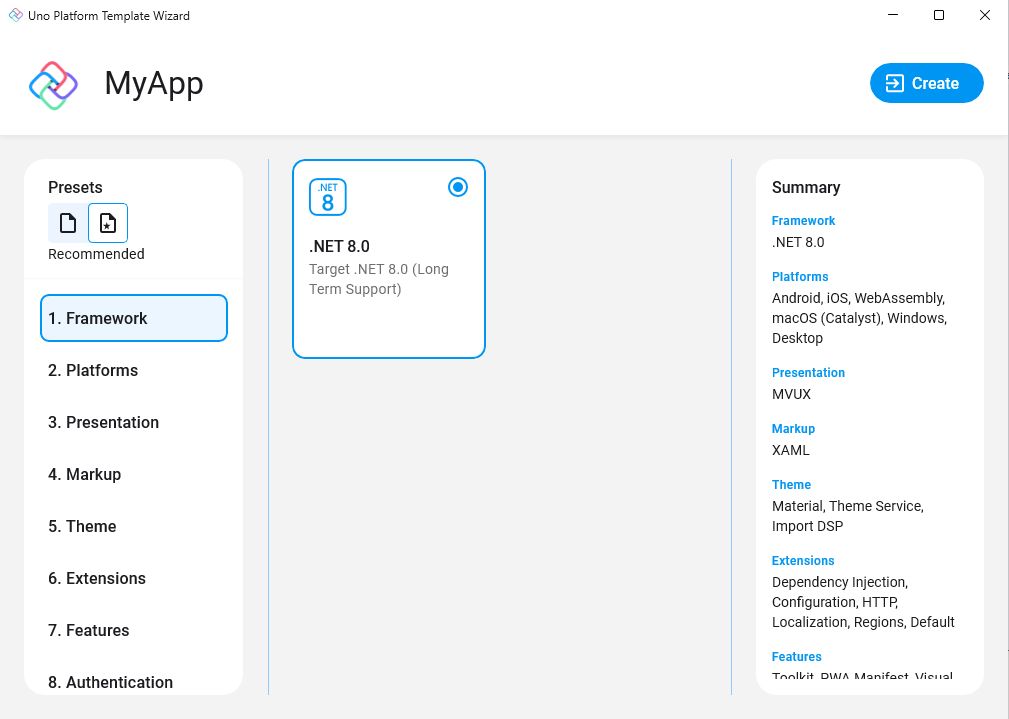
Choose a template preset to build your application
Tip
For a detailed overview of the Uno Platform project template wizard and all its options, see this.
Note
Starting with Uno.Sdk 6.0, Skia rendering is now the default rendering engine in Uno Platform templates for iOS/Android/WebAssembly. If you prefer native rendering instead, you can switch this setting in the
Featurestab underRenderer.Click the create button
Ensure that the lower left IDE icon shows a check mark and says "Ready"
 . This ensures that the projects have been created, and their dependencies have been restored completely.
A Windows Firewall window may appear. If you do not intend to do Linux development with WSL, check "Private networks" only. Otherwise, check "Public networks" and "Private networks".
A banner at the top of the editor may ask to reload projects, click Reload projects:

-
Important
A notification should appear prompting you to sign in or register with Uno Platform.
Signing in with your Uno Platform account in Visual Studio unlocks powerful tools like Hot Reload, helping you speed up development.
With a single registration, you also gain early access to new features and the opportunity to connect with the Uno Platform community, where you can share feedback and network.
Detailed information on registration and sign-in is available here.

Debug the App
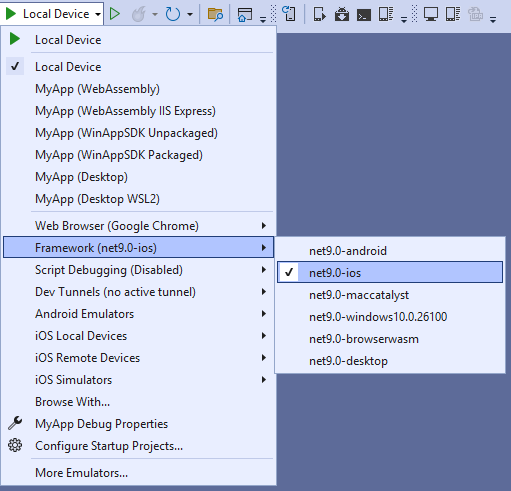
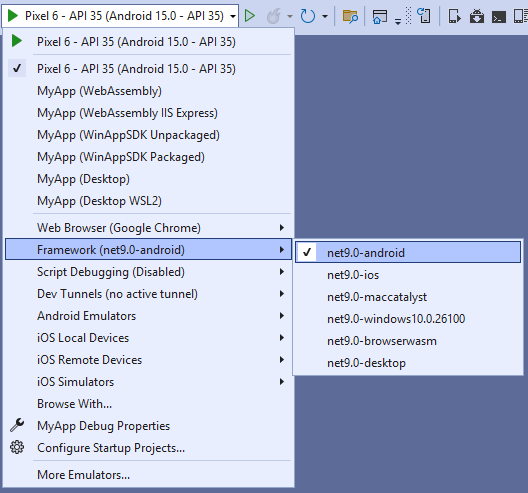
To debug your Uno Platform Desktop target:
Directly on Windows:
In the Debug toolbar drop-down, select the profile
MyApp (Desktop)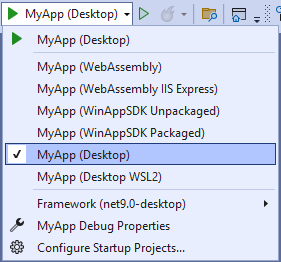
Press
F5to debug.
Using WSL with X11:
In the Debug toolbar drop-down, select the profile
MyApp (Desktop WSL2)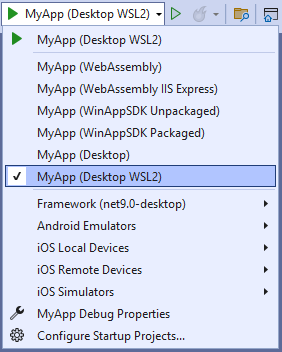
Then press
F5or the green arrow to start debugging the app
You're all set!
Next Steps
Now that you've created and debugged your app, you can continue development or you can use Copilot to accelerate your workflow.
Learn more about:
- Uno Platform features and architecture
- Hot Reload features
- Uno Platform App solution structure
- Troubleshooting
- How-tos and Tutorials See real-world examples with working code.
- List of views implemented in Uno for the set of available controls and their properties.