Uno Material
Important
UnoFeatures: Material — add <UnoFeatures>Material</UnoFeatures> to your app's .csproj to add Uno Material.
The Uno Material library is enabled through the Material UnoFeatures, which brings in the required packages for new and existing Uno Platform solutions.
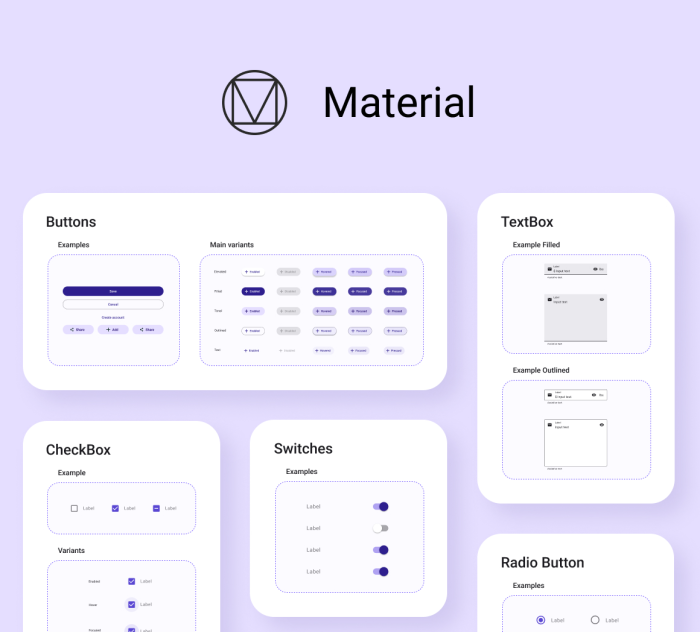
Uno Material lets you apply Material Design 3 styling to your application with just a few lines of code.
Warning
If you are updating Uno Material to v2 from an older 1.x version of the package, additional steps will be required. Refer to the Uno Material Migration Guide.
Getting Started
Initialization of the Uno Material resources is handled by the specialized MaterialTheme ResourceDictionary.
MaterialTheme
Constructors
| Constructor | Description |
|---|---|
MaterialTheme() |
Initializes a new instance of the MaterialTheme resource dictionary. |
MaterialTheme(ResourceDictionary? colorOverride, ResourceDictionary? fontOverride) |
Initializes a new instance of the MaterialTheme resource dictionary and applies the given overrides |
Properties
| Property | Type | Description |
|---|---|---|
ColorOverrideSource |
string |
(Optional) Gets or sets a Uniform Resource Identifier that provides the source location of a ResourceDictionary containing overrides for the default Uno Material Color resources |
FontOverrideSource |
string |
(Optional) Gets or sets a Uniform Resource Identifier that provides the source location of a ResourceDictionary containing overrides for the default Uno Material font resources |
Creating a new project with Uno Material
Note
Make sure to setup your environment first by following our instructions.
Follow the steps in the Getting Started with Visual Studio instructions to launch the Uno Platform Template Wizard.
Select
Materialunder theThemesection.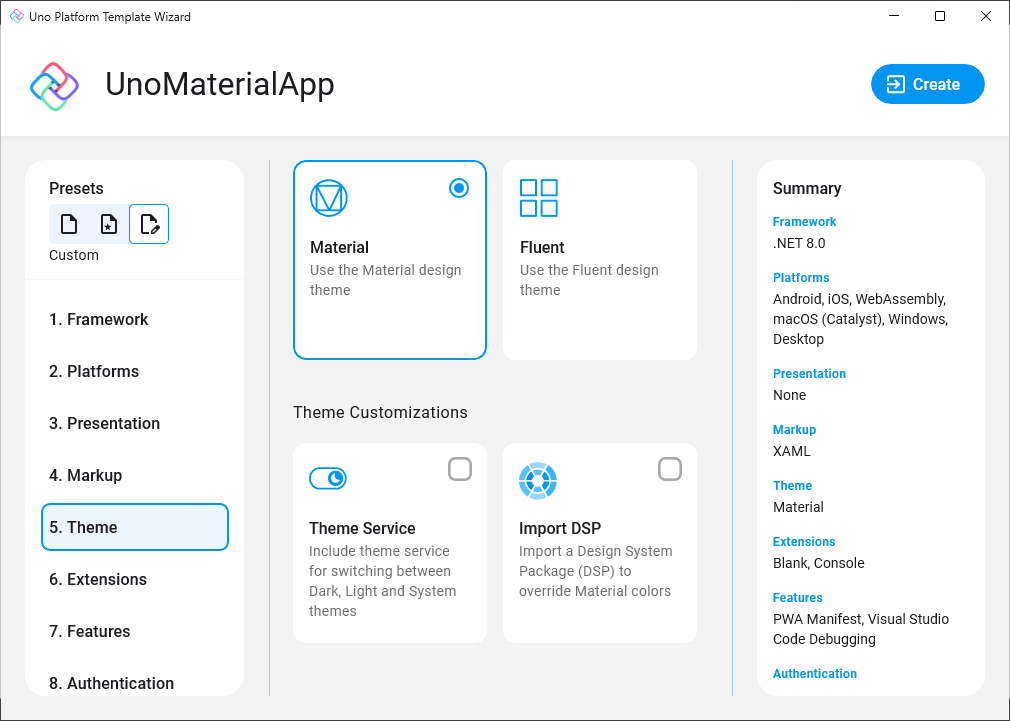
Installing Uno Material in an existing project
Depending on the type of project template that the Uno Platform application was created with, follow the instructions below to install Uno Material.
- Single Project Template
- Multi-Head Project Template (Legacy)
- Shared Project (.shproj) Template (Legacy)
Edit your project file (
PROJECT_NAME.csproj) and addMaterialto the list ofUnoFeatures:<UnoFeatures>Material</UnoFeatures>Initialize
MaterialThemein theApp.xaml:<Application.Resources> <ResourceDictionary> <ResourceDictionary.MergedDictionaries> <!-- Code ommitted of brevity --> <MaterialTheme xmlns="using:Uno.Material" /> </ResourceDictionary.MergedDictionaries> </ResourceDictionary> </Application.Resources>
Customization
The following guides require the creation of new ResourceDictionary files in your application project. For more information on how to define styles and resources in a separate ResourceDictionary, refer to the resource management documentation.
Color Overrides using Material Theme Builder and DSP format
It is possible to use the Material Theme Builder to generate a custom color palette derived from your own basic colors. The generated palette is provided in the DSP format and can be used to override the default Uno Material colors.
The tooling required to generate the Material Colors Override file from a theme file (JSON file) will be present by default when creating an Uno Platform application with support for Uno Material from the Wizard.

Follow this link to get more Information about the DSP tooling.
Manual Color Overrides
Use this when you want to manually override the default color palette from the Uno Material library.
Add a new Resource Dictionary named
MaterialColorsOverride.xamlto the application project, for example, underStyles/Application.Replace the content with:
<ResourceDictionary xmlns="http://schemas.microsoft.com/winfx/2006/xaml/presentation"
                    xmlns:x="http://schemas.microsoft.com/winfx/2006/xaml">
    <ResourceDictionary.ThemeDictionaries>

        <!-- Light Theme -->
        <ResourceDictionary x:Key="Light">
            <!-- Primary -->
            <Color x:Key="PrimaryColor">#6750A4</Color>
            <Color x:Key="PrimaryInverseColor">#D0BCFF</Color>
            <Color x:Key="OnPrimaryColor">#FFFFFF</Color>
            <Color x:Key="PrimaryContainerColor">#EADDFF</Color>
            <Color x:Key="OnPrimaryContainerColor">#21005E</Color>

            <!-- Primary Variant Legacy Colors -->
            <Color x:Key="PrimaryVariantDarkColor">#353FE5</Color>
            <Color x:Key="PrimaryVariantLightColor">#B6A8FB</Color>

            <!-- Secondary -->
            <Color x:Key="SecondaryColor">#625B71</Color>
            <Color x:Key="OnSecondaryColor">#FFFFFF</Color>
            <Color x:Key="SecondaryContainerColor">#E5DFF9</Color>
            <Color x:Key="OnSecondaryContainerColor">#1B192C</Color>

            <!-- Secondary Variant Legacy Colors -->
            <Color x:Key="SecondaryVariantDarkColor">#2BB27E</Color>
            <Color x:Key="SecondaryVariantLightColor">#9CFFDF</Color>

            <!-- Tertiary -->
            <Color x:Key="TertiaryColor">#7D5260</Color>
            <Color x:Key="OnTertiaryColor">#FFFFFF</Color>
            <Color x:Key="TertiaryContainerColor">#FFD8E4</Color>
            <Color x:Key="OnTertiaryContainerColor">#370B1E</Color>

            <!-- Error -->
            <Color x:Key="ErrorColor">#B3261E</Color>
            <Color x:Key="OnErrorColor">#FFFFFF</Color>
            <Color x:Key="ErrorContainerColor">#F9DEDC</Color>
            <Color x:Key="OnErrorContainerColor">#370B1E</Color>

            <!-- Background -->
            <Color x:Key="BackgroundColor">#FFFBFE</Color>
            <Color x:Key="OnBackgroundColor">#1C1B1F</Color>

            <!-- Surface -->
            <Color x:Key="SurfaceColor">#FFFBFE</Color>
            <Color x:Key="OnSurfaceColor">#1C1B1F</Color>
            <Color x:Key="SurfaceVariantColor">#E7E0EC</Color>
            <Color x:Key="OnSurfaceVariantColor">#A5A0AC</Color>
            <Color x:Key="SurfaceInverseColor">#313033</Color>
            <Color x:Key="OnSurfaceInverseColor">#F4EFF4</Color>
            <Color x:Key="SurfaceTintColor">#5946D2</Color>

            <!-- Outline -->
            <Color x:Key="OutlineColor">#79747E</Color>
            <Color x:Key="OutlineVariantColor">#C9C5D0</Color>
        </ResourceDictionary>

        <!-- Dark Theme -->
        <ResourceDictionary x:Key="Dark">
            <!-- Primary -->
            <Color x:Key="PrimaryColor">#D0BCFF</Color>
            <Color x:Key="OnPrimaryColor">#371E73</Color>
            <Color x:Key="PrimaryContainerColor">#4F378B</Color>
            <Color x:Key="OnPrimaryContainerColor">#EADDFF</Color>
            <Color x:Key="PrimaryInverseColor">#6750A4</Color>

            <!-- Primary Variant Legacy Colors -->
            <Color x:Key="PrimaryVariantDarkColor">#353FE5</Color>
            <Color x:Key="PrimaryVariantLightColor">#D4CBFC</Color>

            <!-- Secondary -->
            <Color x:Key="SecondaryColor">#CCC2DC</Color>
            <Color x:Key="OnSecondaryColor">#332D41</Color>
            <Color x:Key="SecondaryContainerColor">#474459</Color>
            <Color x:Key="OnSecondaryContainerColor">#E5DFF9</Color>

            <!-- Secondary Variant Legacy Colors -->
            <Color x:Key="SecondaryVariantDarkColor">#2BB27E</Color>
            <Color x:Key="SecondaryVariantLightColor">#9CFFDF</Color>

            <!-- Tertiary -->
            <Color x:Key="TertiaryColor">#EFB8C8</Color>
            <Color x:Key="OnTertiaryColor">#492532</Color>
            <Color x:Key="TertiaryContainerColor">#633B48</Color>
            <Color x:Key="OnTertiaryContainerColor">#FFD8E4</Color>

            <!-- Error -->
            <Color x:Key="ErrorColor">#F2B8B5</Color>
            <Color x:Key="OnErrorColor">#601410</Color>
            <Color x:Key="ErrorContainerColor">#8C1D18</Color>
            <Color x:Key="OnErrorContainerColor">#F9DEDC</Color>

            <!-- Background -->
            <Color x:Key="BackgroundColor">#1C1B1F</Color>
            <Color x:Key="OnBackgroundColor">#E6E1E5</Color>

            <!-- Surface -->
            <Color x:Key="SurfaceColor">#1C1B1F</Color>
            <Color x:Key="OnSurfaceColor">#E6E1E5</Color>
            <Color x:Key="SurfaceVariantColor">#49454F</Color>
            <Color x:Key="OnSurfaceVariantColor">#CAC4D0</Color>
            <Color x:Key="SurfaceInverseColor">#E6E1E5</Color>
            <Color x:Key="OnSurfaceInverseColor">#313033</Color>
            <Color x:Key="SurfaceTintColor">#C7BFFF</Color>

            <!-- Outline -->
            <Color x:Key="OutlineColor">#938F99</Color>
            <Color x:Key="OutlineVariantColor">#57545D</Color>
        </ResourceDictionary>

    </ResourceDictionary.ThemeDictionaries>
</ResourceDictionary>
In
App.xaml, update<MaterialTheme />with the override from the previous steps:<MaterialTheme xmlns="using:Uno.Material" ColorOverrideSource="ms-appx:///Styles/Application/MaterialColorsOverride.xaml" />
Change Default Font
By default, Uno Material comes pre-packaged with the Roboto font families and automatically includes them in your application. Upon installation of the Uno Material package, you will have the following resources available: MaterialLightFontFamily, MaterialRegularFontFamily, and MaterialMediumFontFamily.
If you would like Uno Material to use a different font, you can override the default font families by following these steps:
Add the custom font following Custom Fonts documentation.
Add a new Resource Dictionary named
MaterialFontsOverride.xamlto the application project, for example, underStyles/Application.Assuming the font file has been placed in a directory such as
Assets/Fonts/MyCustomFont.ttf, your override file would look like the following:<ResourceDictionary xmlns="http://schemas.microsoft.com/winfx/2006/xaml/presentation" xmlns:x="http://schemas.microsoft.com/winfx/2006/xaml"> <FontFamily x:Key="MaterialLightFontFamily">ms-appx:///Assets/Fonts/MyCustomFont.ttf#MyCustomFont</FontFamily> <FontFamily x:Key="MaterialMediumFontFamily">ms-appx:///Assets/Fonts/MyCustomFont.ttf#MyCustomFont</FontFamily> <FontFamily x:Key="MaterialRegularFontFamily">ms-appx:///Assets/Fonts/MyCustomFont.ttfMyCustomFont</FontFamily> </ResourceDictionary>In the
App.xaml, update<MaterialTheme />with the override from the previous steps:<MaterialTheme xmlns="using:Uno.Material" FontOverrideSource="ms-appx:///Styles/Application/MaterialFontsOverride.xaml" />
Using C# Markup
Uno Material also has support for C# Markup through a Uno.Material.WinUI.Markup NuGet Package.
To get started with Uno Material in your C# Markup application, add the Uno.Material.WinUI.Markup NuGet package to your application project.
Then, add the following code to your App.xaml.cs:
using Uno.Material.Markup;

this.Build(r => r.UseMaterial(
     //optional
     new Styles.ColorPaletteOverride(),
     //optional
     new Styles.MaterialFontsOverride()));