Credit: This article originally appeared at https://blog.mzikmund.com/2020/02/splash-screen-in-uno-platform-apps/, written by Uno community champion Martin Zikmund.
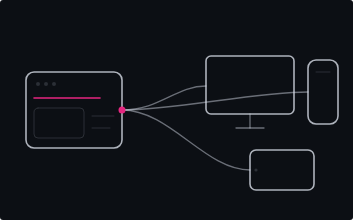
A custom splash screen is an integral part of great user experience. Uno Platform makes customizing it as well as unifying it super easy as we shall see in this article.
UWP
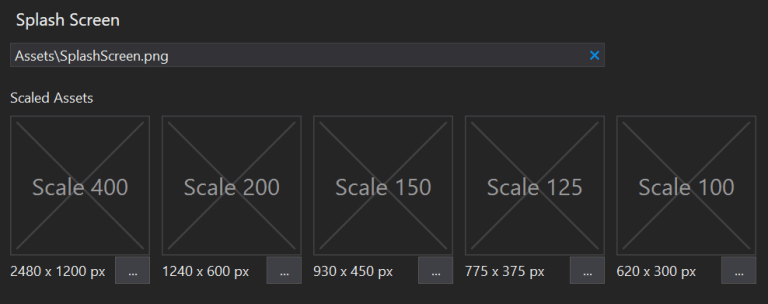
Let’s start simple. UWP supports splash screens out of the box using image assets. By default, we can find a SplashScreen.scale-200.png image in the Shared project of our Uno Platform solution, which we can replace by a custom image. We can provide multiple scales of the images by adding them in the Assets folder and even set custom background color via the Package.appxmanifest file in the UWP project head.
Android
For a splash screen on Android, we can use a custom drawable. Open the Resources/values/Styles.xml file in the Android project head and update the AppTheme style with a android:windowBackground item:
| <?xml version=“1.0“ encoding=“utf-8“ ?> | |
| <resources> | |
| <style name=“AppTheme“ parent=“Theme.AppCompat.Light“> | |
| <!– This removes the ActionBar –> | |
| <item name=“windowActionBar“>false</item> | |
| <item name=“android:windowActionBar“>false</item> | |
| <item name=“windowNoTitle“>true</item> | |
| <item name=“android:windowNoTitle“>true</item> | |
| <!– Splash screen –> | |
| <item name=“android:windowBackground“>@drawable/splash</item> | |
| </style> | |
| </resources> |
Now we can create a splash.xml drawable in the Resources/drawable/ folder:
| <?xml version=“1.0“ encoding=“utf-8“?> | |
| <layer-list xmlns:android=“http://schemas.android.com/apk/res/android“> | |
| <item> | |
| <!– background color –> | |
| <color android:color=“#101010“/> | |
| </item> | |
| <item> | |
| <!– splash image –> | |
| <bitmap | |
| android:src=“@drawable/splashscreen“ | |
| android:tileMode=“disabled“ | |
| android:gravity=“center“ /> | |
| </item> | |
| </layer-list> |
The neat little trick is that the bitmap element uses the splashscreen drawable, which refers to the SplashScreen.scale-XYZ.png images which are automagically copied from the Shared project to the Android resource folders thanks to Uno Platform. Even better – Uno copies all the DPI scales as well, so the system uses the most appropriate variant based on DPI of the display. Note also that we can customize the splash screen background by modifying the first item’s color. Of course, if you want to have a platform-specifc splash screen on Android, you can use a different drawable name and add your images directly into the drawable folders in the Android project.

iOS
On iOS we use a Storyboard to show our splash screen. Right-click the iOS project and select Add > New item… In the dialog window find the Empty Storyboard template, name the file SplashScreen.storyboard, and confirm. Make sure you are connected to a remote macOS and open the storyboard file, which should load the Xamarin iOS Designer.
Open the Toolbox window in Visual Studio (which is probably pinned on the left side of the workspace, or you can just press Ctrl + Q and search for it), and find View Controller and drag it onto the designer surface. Repeat the process for an ImageView, which we drop onto our view controller.

The next step is to define the constraints for the image. We can do this in multiple ways. If you are not familiar with the Xamarin iOS designer, there are detailed docs available. One of the paths in short is to switch into constraint editing mode using button in the upper right corner:

We then drag the handles to create various constraints such as center, width and height:

I have set up constraints for the ImageView as follows:

This way, the image spans the whole screen. To set the splash screen background, we can use the Background of the ImageView. Select the image and find the property in Properties window:

In addition, we must make sure to set the Content Mode to Aspect Fit, so that the splash screen image fits the screen properly.

Finally, we click somewhere in the free space around the view controller and look into the Properties window. We should see a Can be Launch Screen checkbox in the Storyboard Document section. We need to check this so that the storyboard can be set.

Now let’s save the file and close it. You might have noticed we didn’t set the image path in the ImageView. The reason is that Uno Platform copies the assets into the project at build time, but the designer doesn’t know that, and when you attempt to set the image to a path that doesn’t exist at design time, it will just omit it when the file is saved. To avoid this, we must manually add the image attribute to the storyboard file. We find the file in file explorer and open it in our favorite text editor. inside the file we find <imageView> XML element and add our attribute to it:
| <imageView … image=“Assets/SplashScreen“> |
Now we save the changes and close the file. Note that this “hacky” step is required only if you want to use the splash screen image from the shared folder. If you want to use an iOS specific image or layout, you can use the images added directly to the iOS project, and those will work with the designer normally.
Finally, we need to set our storyboard as a launch storyboard. We can do so by opening the Info.plist file and going into the Visual Assets tab. There we change the Launch Screen setting:

Now we can run our application to see if everything worked out right!

Note: In case the splash screen fails to show up, check if you are targeting a current version of iOS in the Deployment Target setting on the Application tab of Info.plist.

WebAssembly
Finally, we tackle WebAssembly (WASM). A splash screen functionality is already built-in, so our only task is to customize it to look just right. Open the WasmScripts/AppManifest.js file in the WASM project:
| var UnoAppManifest = { | |
| splashScreenImage: “Assets/SplashScreen.scale-200.png”, | |
| splashScreenColor: “#101010”, | |
| displayName: “Uno.SplashScreenEverywhere” | |
| } |
The WASM manifest currently requires us to specify the scale of the splash screen image explicitly (I hope to add support for automatic DPI-dependent scaling soon). We can also customize the splash screen background color with splashScreenColor property.
Let’s run the app and see our splash screen come to life!

Source code
Sample source code for this article is available on my GitHub.
Summary
As we have seen, setting up a consistent splash screen experience on all platforms is very seamless with Uno Platform, maybe except some quirks with iOS. The great thing is that Uno Platform allows us to customize these as needed, so each platform can light up with a custom design as we see fit.