🕓 7 MINSkiaSharp fills the cross-platform rendering gap in .NET - a brief look at evolution, rich ecosystem and bright future of SkiaSharp.
Porting a WinUI3 App to Web and Mobile in 30 minutes
-
Uno Platform Team
- Published
Have you ever found yourself at the crossroads of wanting to expand the reach of your WinUI 3 app beyond the confines of desktop? In this blog journey, we’re exploring the ins and outs of porting your WinUI 3 application to web and mobile platforms exploring the process of migrating a typical desktop application to Uno Platform.
This process is crucial for developers who want to target multiple platforms with their WinUI 3 app, aiming to extend the reach of their applications to other platforms, such as mobile (Android & iOS) and web (WASM), without having to write separate code for each.
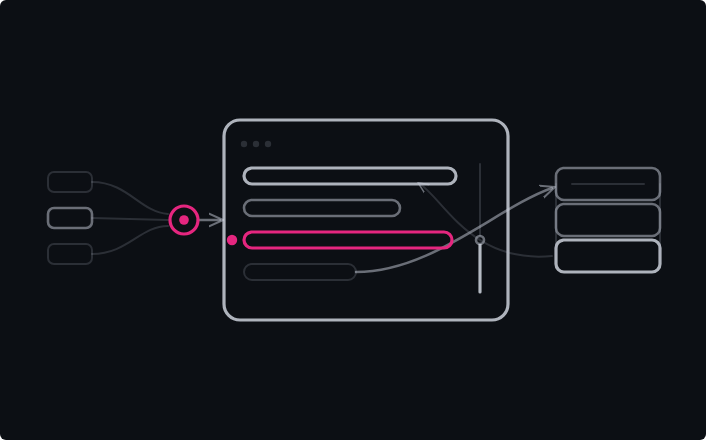
Throughout this tutorial, using the sample app (XamlBrewer) provided by Diederik Krols, we’ll explore the nuances of migrating a WinUI3 desktop application to other mobile platforms and environments like Wasm and GDK. The app, a simple yet effective showcase of Skia samples, will serve as our migration subject.
Note: the original application was new to us. It was not designed to be easily portable by Uno Platform. We took it as a challenge – let’s see how well we do; if we fail, let’s fail in public. We invited the original developer of XAMLBrewer – Diederik Krols – to help us out. Turns out, even he was impressed by how quickly we made the port.
Throughout this tutorial, using the sample app provided by Diederik Krols, we’ll explore the nuances of migrating a WinUI3 desktop application to other mobile platforms and environments like Wasm and GDK. The app, a simple yet effective showcase of Skia samples, will serve as our migration subject.
Follow Along with our Code Sample
Follow along by either using the ported code in our Uno.Samples or watch Nick Randolph and Diedrik's collaborative demo for a step-by-step walkthrough.
Understanding the XAMLBrewer’s Application Structure
The Original Application
The original desktop application we are working with has a simple structure, with a navigation view on the left-hand side and content rendering on the right. The application’s design features include switching between dark and light themes and opening an About page. The code for this application is broken down into three projects. Two are SkiaSharp sample codes, and the third contains the rest of the application.
The Uno Platform Application
When we create a new application on Uno Platform, we start with a class library where the majority of our code will live. This is supplemented by individual platform-specific libraries, which are the actual targets we run. For example, if we wanted to run the Wasm target, we would set it as the startup project. Most package references can be added to the class library, from where they will be transitively added to the target projects.
Setting Up your Uno Platform Application
Let’s begin with the first step in migrating your WinUI3-based application to the Uno Platform. Start by creating an instance of the shell and set it as the root content for the window, then activate it. At this stage, you may want to set the title and the icon for the Windows version of the application.
Adding Package References
The next step in setting up our Uno Platform application is to add the necessary package references. This is done by copying the dependencies from the original application and adding them to the new one. These dependencies include SkiaSharp and the community toolkit MVVM.
Importing Source Code Files
Next, we import all the source code files from the original application. This involves copying and pasting the files with minor tweaks to ensure they work well with the Uno Platform.
Modifying the Application Structure
Finally, we need to modify the application structure slightly. The main change is that the original application’s shell, a window, is converted to a user control in the new Uno application. This is because the Uno platform manages the window itself. As a result, we also need to update the startup code for the app. The new startup code is very similar to what you would see in a new WinUI-based application, with the creation of a frame and navigation to a page.
In the following sections, we will dive deeper into the process of migrating the application, addressing any challenges and peculiarities that arise along the way.
Debugging, Addressing Build Errors, and Running the Application
After setting up the Uno platform application and successfully importing the source code, the next step in the migration process involves debugging and running the application.
As with any development process, debugging is crucial to the migration effort. We might encounter a few build errors after setting up the Uno Platform application and importing the code files. These errors need to be addressed before we can run the application. Debugging involves identifying where the exception is being thrown, understanding the related issues, and making the necessary changes to the code.
You can start testing your application on different target platforms. For instance, you can test the application on GDK and the web (Wasm target). To test on mobile targets, you’ll have to deal with a few quirks, like setting the safe area to visible bounds to ensure the UI fits on the screen correctly. Once you’ve tweaked the settings, you can deploy your application to an iPhone, Android device, or even an Android emulator. It’s impressive that hot restart on an iPhone is quicker than debugging on Android, making the overall testing process more efficient. This highlights the versatility of Uno Platform and the benefits of migrating a desktop application to this platform.
Once the build errors have been addressed, the next step is to run the application. Running the application helps to confirm whether the migration process has been successful. The application is expected to function as it did before the migration. However, it is normal to encounter issues during this stage. This could range from minor issues, such as missing images, to more significant problems, like an unresponsive theme switcher.
Adapting the Code to Support Theme Switching
One of the challenges experienced during the migration process was getting the theme switcher to work. In the original application, the theme could be changed at any level down the control hierarchy. However, on Uno Platform, theme switching needs to be done at the application level. This means the code for applying the theme had to be slightly modified.
The solution was to look for the XamlRoot, essentially the root of the entire application. To account for the fact that this is likely to be null at first, then apply theme was called on the Loaded event for the shell. This ensures the theme is applied when the shell is attached to the visual tree.
Experiencing the Benefits of Migration
Ultimately, the aim is to reuse as much WinUI code as possible. It’s impressive how much of this code can be deployed cross-platform. For instance, Skia, a technology-neutral engine, works well across platforms and can be used for custom graphics and layouts.
In conclusion, migrating a WinUI3-based application to the Uno Platform involves a series of steps, including setting up the shell, dealing with build errors, fixing the icons, and testing on various platforms. The process requires a bit of debugging and problem-solving, but the result is a versatile application that can run on multiple platforms, from desktop to mobile.
Since WinUI 3 and UWP XAML are very similar in their API, Uno Platform offers compatibility with both. This article goes further into the differences and how they apply to Uno Platform.
Next Steps
To upgrade to the latest release of Uno Platform, please update your packages to 4.10 via your Visual Studio NuGet package manager! If you are new to Uno Platform, following our official getting started, guide is the best way to get started. (10 min to complete)
Uno Platform
Follow us on Twitter
Tags:
Related Posts

🕓 6 MINSkiaSharp is graduating to 4.0 - let's unpack what it means for cross-platform .NET apps with Uno Platform.
•
June 29, 2026