This is Part 2 of a two-part series. You can find Part 1 here.
In our previous article, we introduced the Ethereum blockchain, itemized tools used for building, testing and deploying its networks, and shared some resources to help get a deeper understanding of the technology and its ecosystem.
In this article we are going to delve deeper into a part of the Ethereum blockchain that allows you to make executable functions/methods from decentralized apps.

Blockchain is an important technology for several reasons. It possesses several properties that are beneficial to business sectors that require trust, security and ease of sharing of data:
- Transparency: This blockchain property ensures that all connected parties have access to and can track all transactions and work done on the network.
- Security: This property ensures the protection of the transactions and work done in the network using cryptography algorithms and methods to encrypt and decrypt transactions.
- Immutability: This property safeguards the integrity of transactions and data by preventing the modification or alteration of previously stored data.
- Traceability: This property is observed in a blockchain when a completed transaction is linked to a previously completed transaction thus ensuring the verification of the history of all transactions in the network.
- Distributed: This property allows for a reduction in both human and financial costs since the transactions and data of the network are not stored in one data center that is typically costly and requires human resources to run and maintain.
Aside from the financial sector, another sector that will benefit greatly from blockchain technology is Healthcare. From healthcare data sharing between stakeholders to drug shipment tracking this sector has several avenues that can utilize and benefit from blockchain technology.
This is why this series, showcasing how to build an Uno platform cross platform application that connects to a blockchain network to track drug shipments between relevant parties could be relevant to Healthcare systems and application developers.
We are going to delve into smart contacts with a simplified real-world example of Drug shipments.
For the sake of simplicity, we will be dealing with only the actual Drug shipment and ignoring other factors involved in the real-life shipment pipeline such as Payment of fees, insurance etc.
In summary, we have Four CD types of users:
- Manufacturer: This is the typical large pharmaceutical companies that make drugs and distribute shipments to wholesalers.
- Wholesaler: This is your typical large scale brand drug pharmacies and wholesalers that distribute drug shipments to smaller pharmacies or their smaller patient accessible subsidiaries. With this type of user, initial drug shipments received from manufacturers are broken down into smaller drug shipments to be dispatched to various pharmacies in their network.
- Pharmacy: This is your typical corner store pharmacy where drug shipments received from wholesalers are further broken down into smaller shipments to be dispatched/dispensed to individual people/patients.
- Patient: This is your typical person (You & I) that procures drugs from a pharmacy and consumes it. Since we cannot create and or distribute drugs (Suppress your inner Walter White alter ego 😉) you just need to connect to a pharmacies network receive your drug shipment and consume it.
The diagram illustrated below shows the possible flow of a drug shipment(s) between parties involved:
As previously mentioned, we will be using Ethereum smart contracts which are typically written using the programming language called Solidity.
To represent a Manufacturer, Wholesaler or Pharmacy’s network and functions that can be executed in the given network, we will create three smart contracts:
- Drug Shipment: This smart contract inherits from Open-Zeppelin’s implementation of a type of non-fungible token (NFT) called ECR721.
With the principle of inheritance in object-oriented programming in mind, what you have from this inheritance relationship between
DrugShipment and ECR721 smart contracts is the ability to access public variables and functions defined in ECR 721 in the DrugShipment smart contract. In addition to inherited variables and functions, the drug shipment defines and implements several variables and functions aimed at storing the details previous and current owners of drug shipments, creating, dispatching and consuming of drug shipments. - Wholesaler: The wholesaler intents from the DrugShipment smart contract and as such has access to the public variables and functions defined and inherited by the DrugShipment.
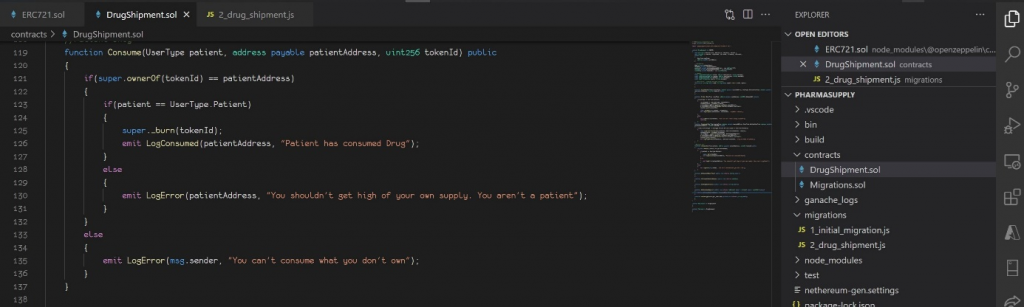
- Pharmacy: In similar fashion, the Pharmacy smart contract inherits from the DrugShipment smart contract. However, the Pharmacy smart contract has an executable Consume function that can only be executed by a Patient connected to their network that owns/is in
possession of a drug shipment previously owned and dispatched from a pharmacy.
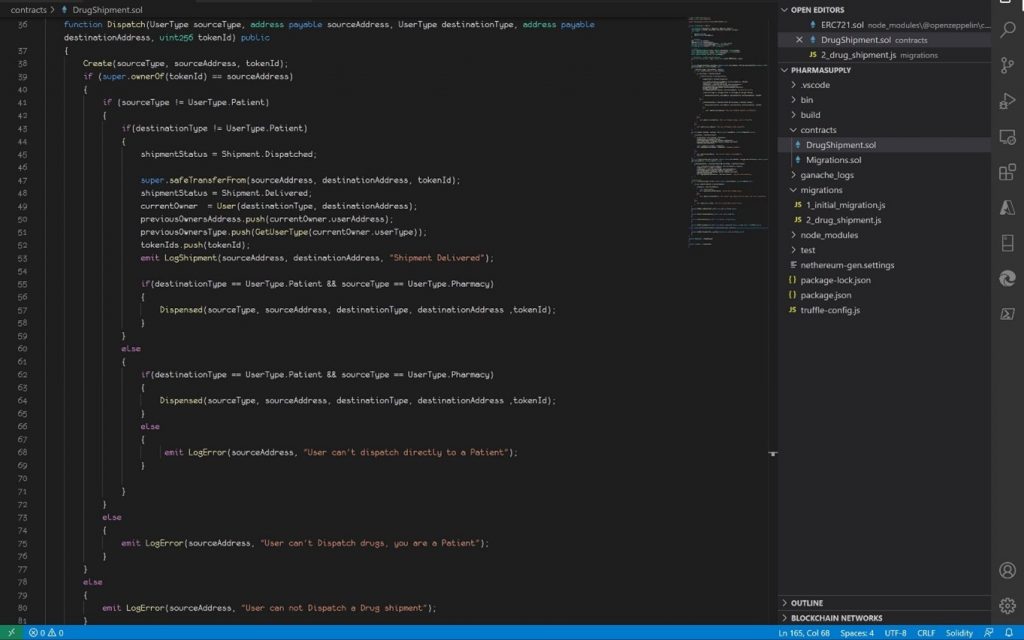
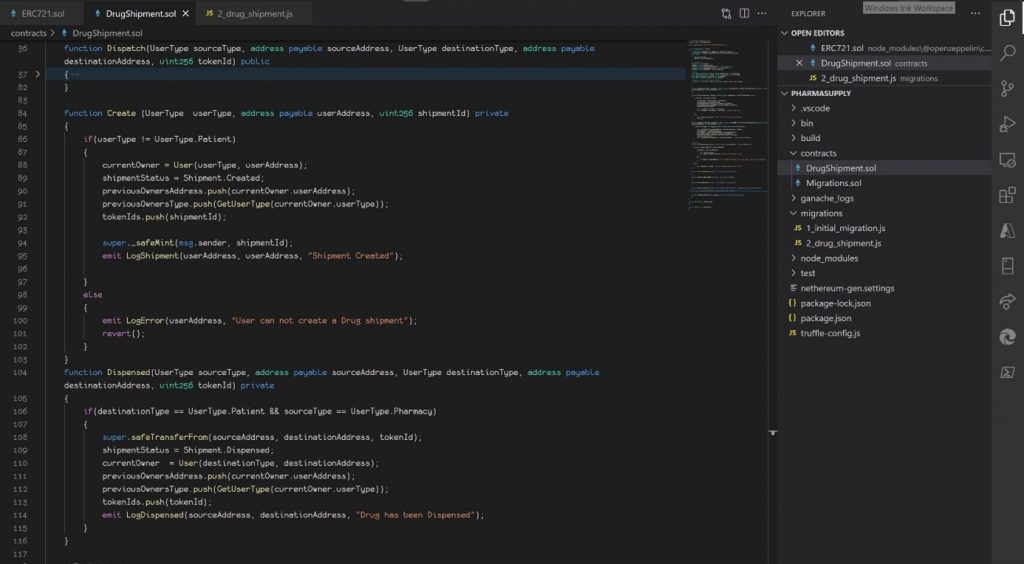
The code snippets below show some of the key functions in the smart
contracts discussed above.
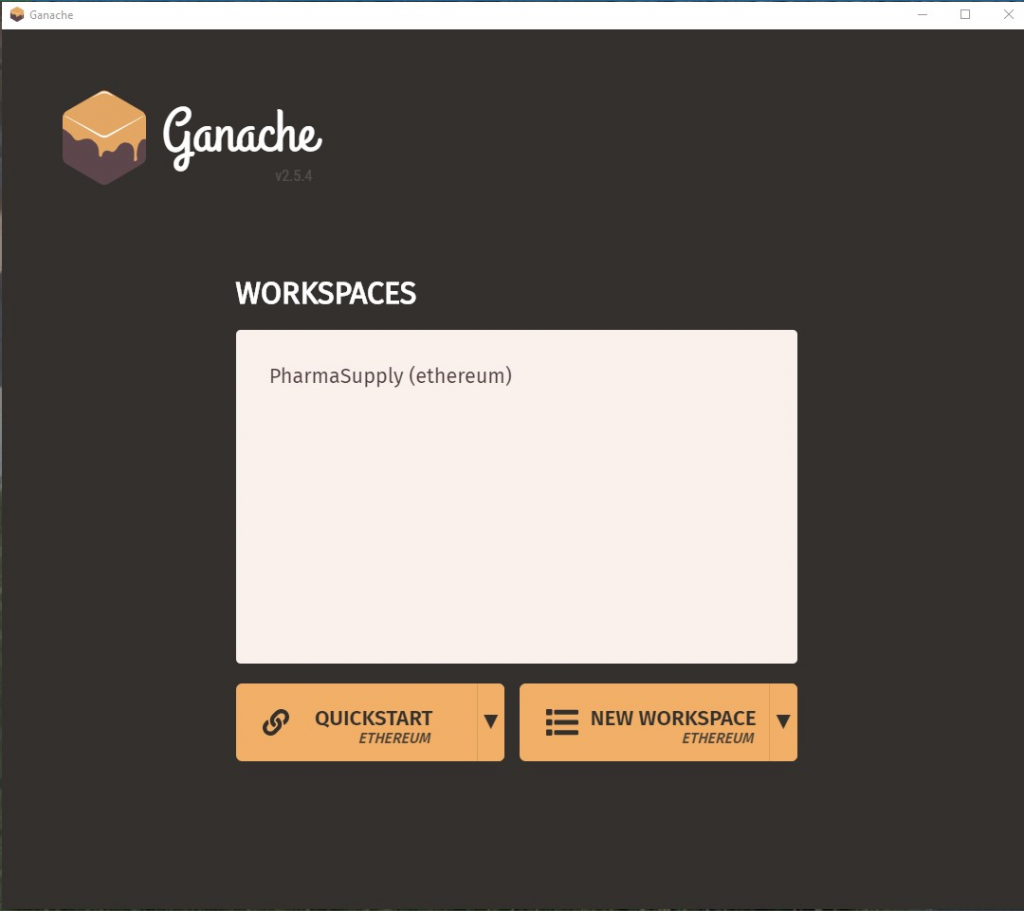
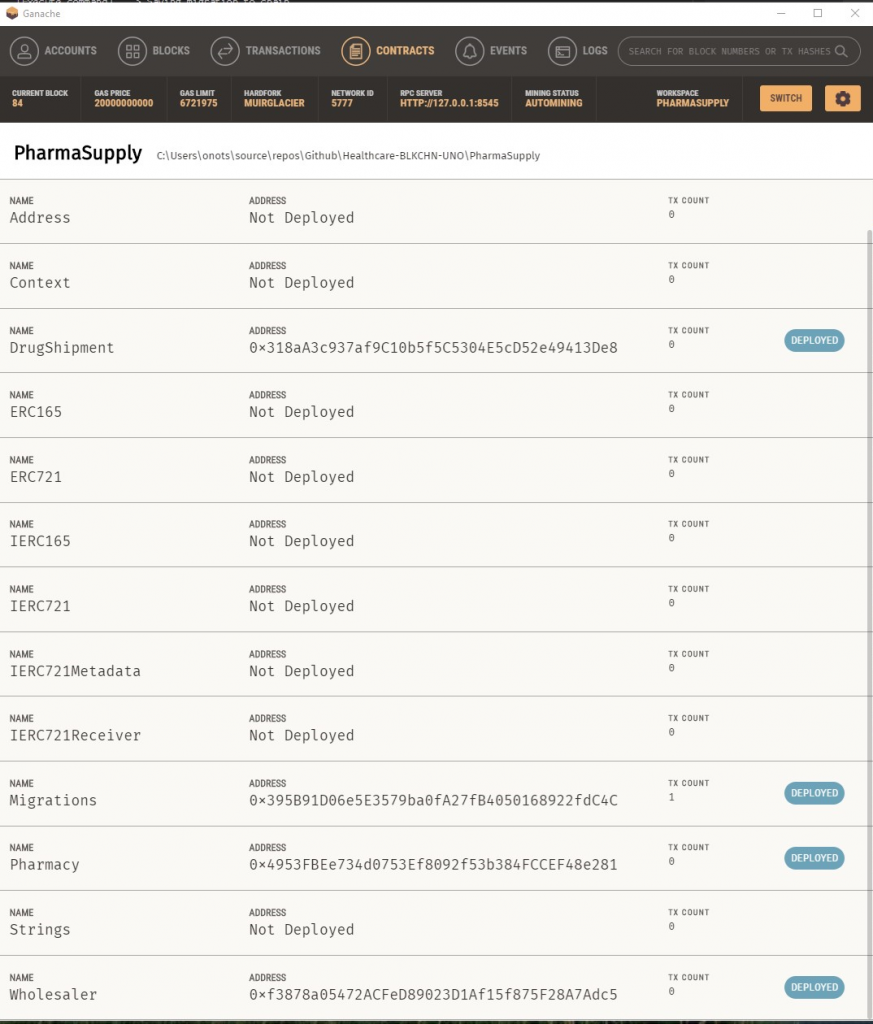
To deploy the contracts and view transactions on the Ganache client, follow the steps itemized below:
- Open Ganache Desktop client and use a default Workspace
configuration (QUICKSTART Ethereum) or create yours (NEW WORKSPACE Ethereum). Take note of the RPC Server address and port number.
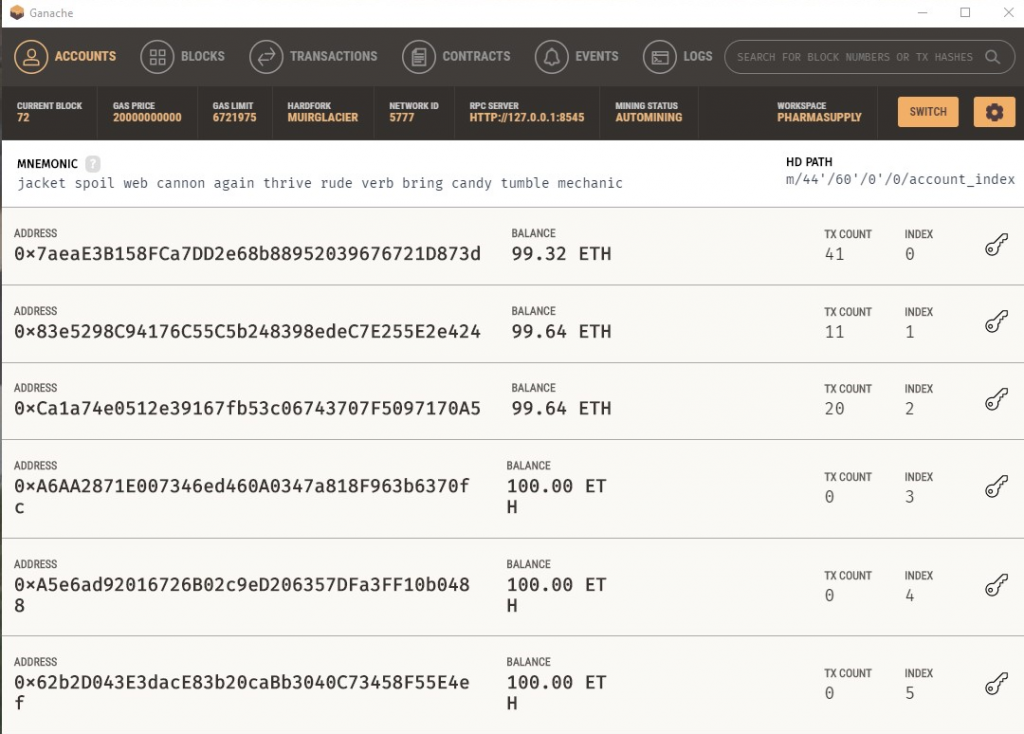
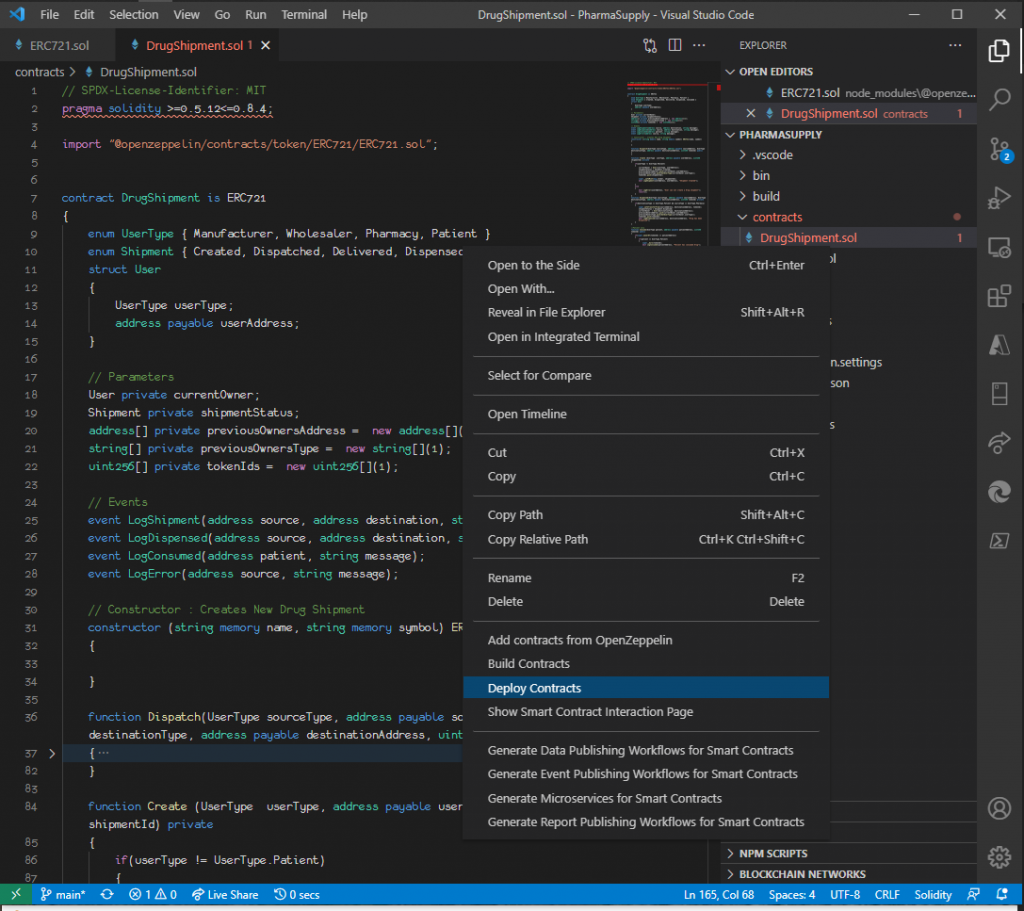
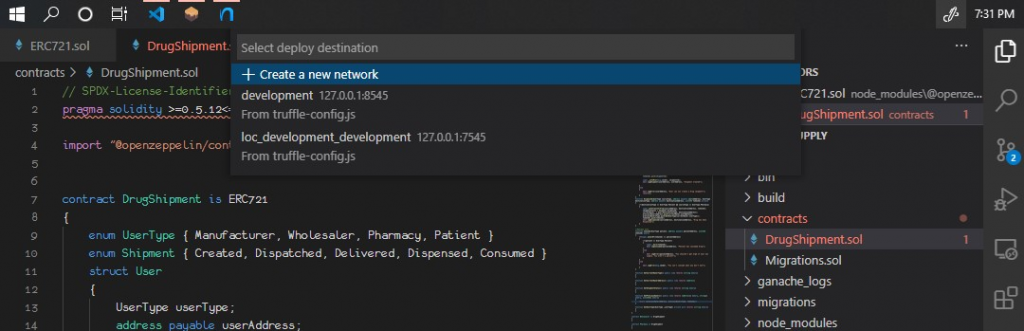
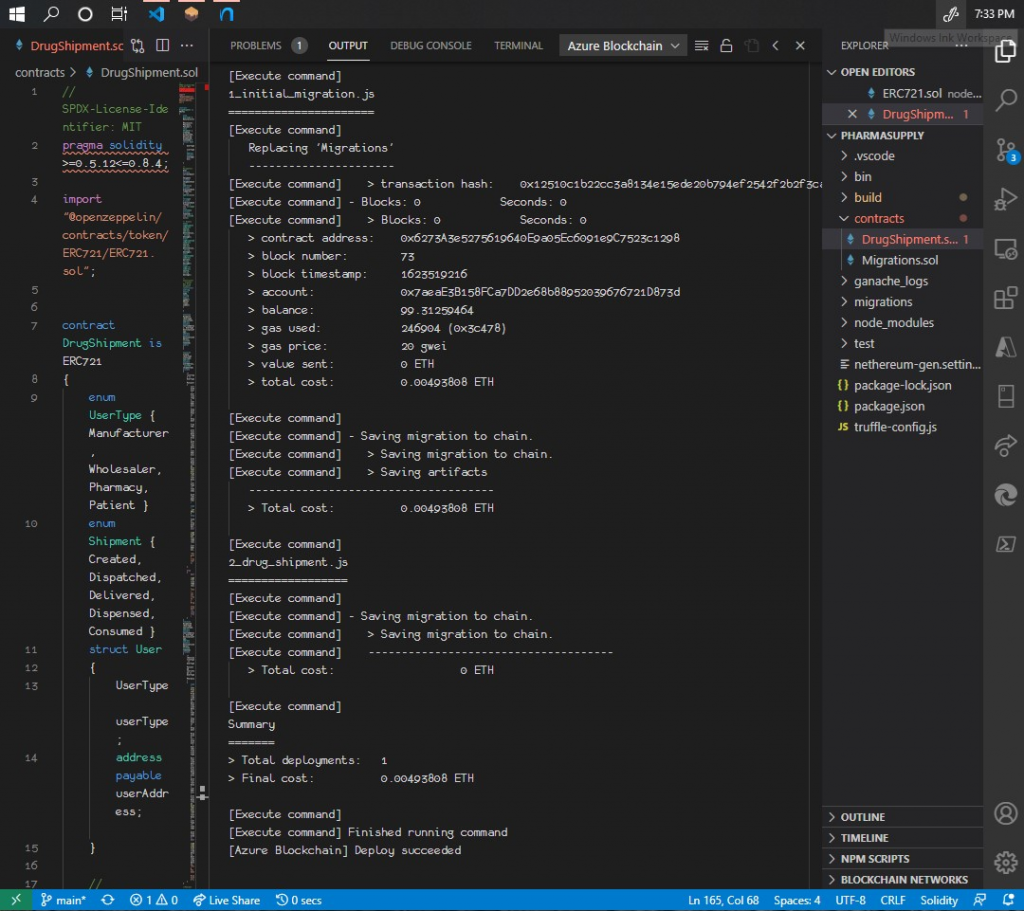
- Using Visual studio code and ensuring you have installed the Blockchain Development kit for Ethereum by Microsoft, right click on the sol contract and then click on deploy contracts. it will ask you to select a network, select the network matching the network address and port of your Ganache Desktop client. This will build compile and then deploy your contracts to the Ganache test Network. you can confirm this in the Contracts and Transactions tabs.
- In the tests folder you will see sol file, this is a test file that allows you to run some of the functions in the smart contract and test them. To do this use the command below to run the tests.
truffletest./test/drug_shipment.js
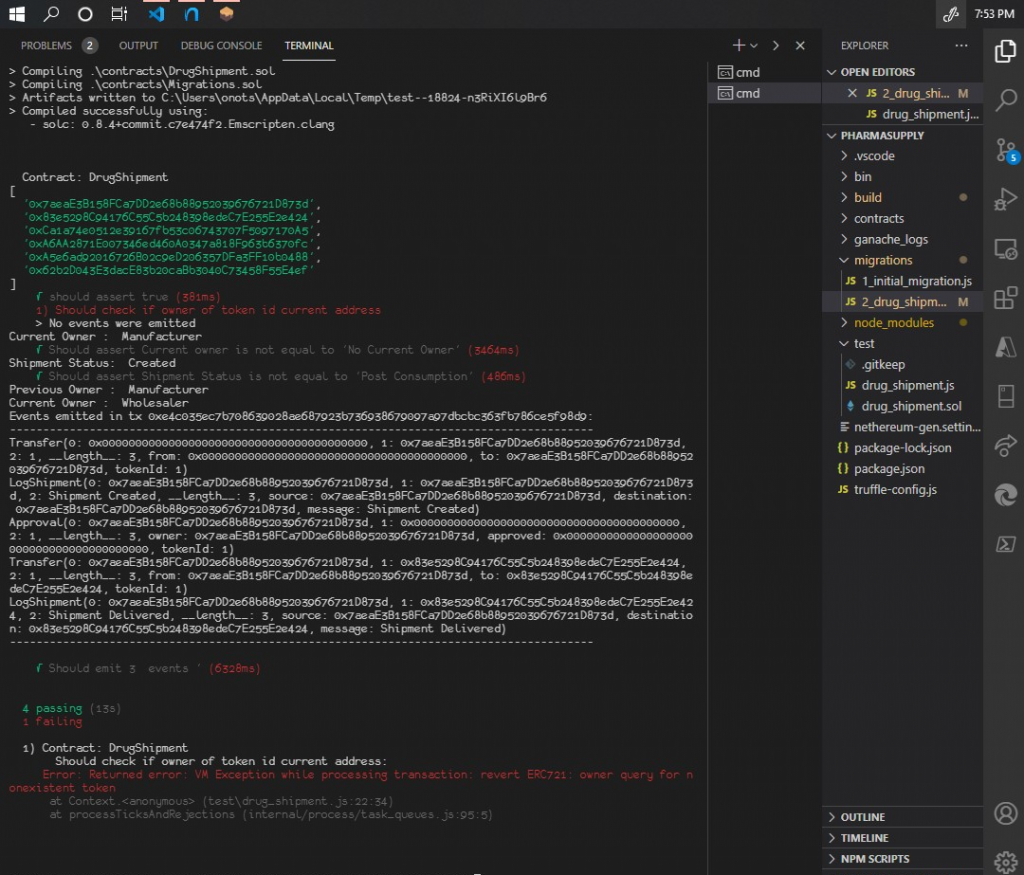
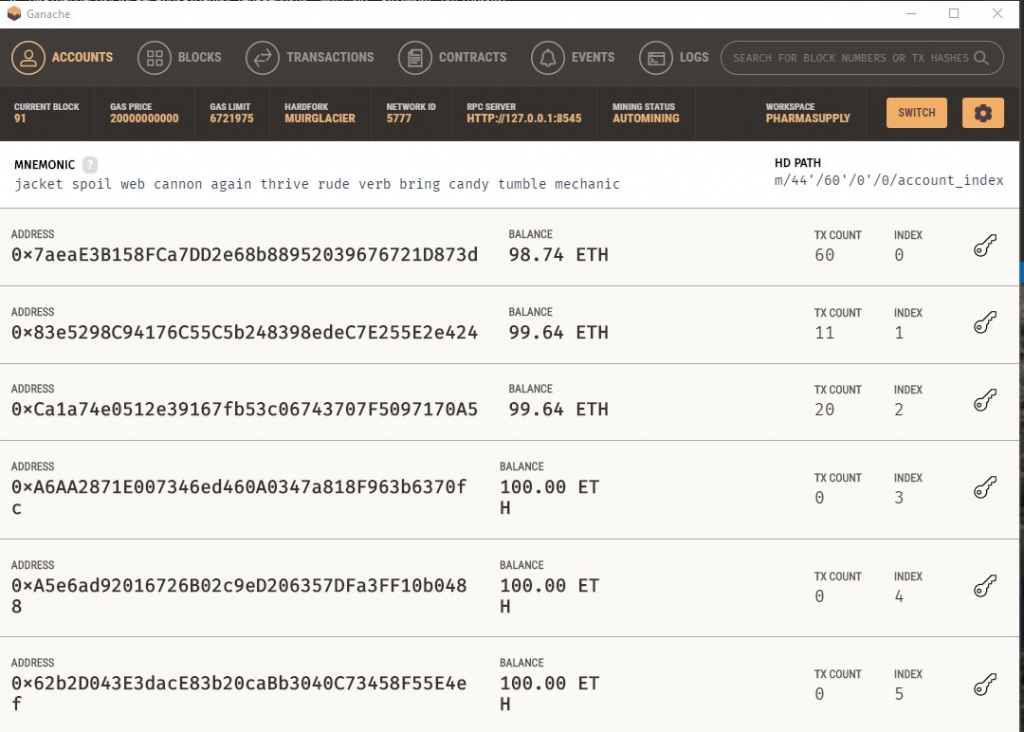
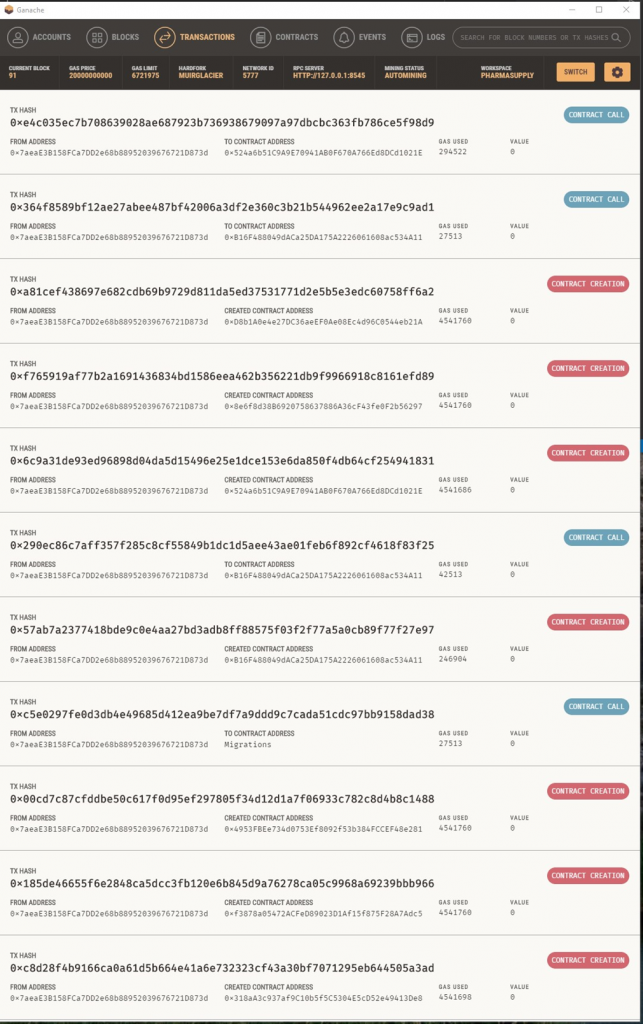
- If you check your Ganache Desktop client, you will notice changes to balance of Ethers in the test accounts that were used. Also, you will see new transactions and events in transactions tab. The images below illustrate this:
At this point, we can start looking into the porting of the smart contracts into Uno platform cross-targeted library. Specifically, our libraries will be targeting the following platforms:
- Android
- iOS
- MacOS
- Windows
- WebAssembly
In order to achieve this, we will break down the series of steps required to create the libraries into 2 Stages:
- C# code generation using Visual Studio Code and its 3rd party Solidity Extension.
- Uno platform cross-targeted library creation using the above generated code.
STAGE 1:C# code generation using Visual Studio Code and its 3rd party Solidity Extension.
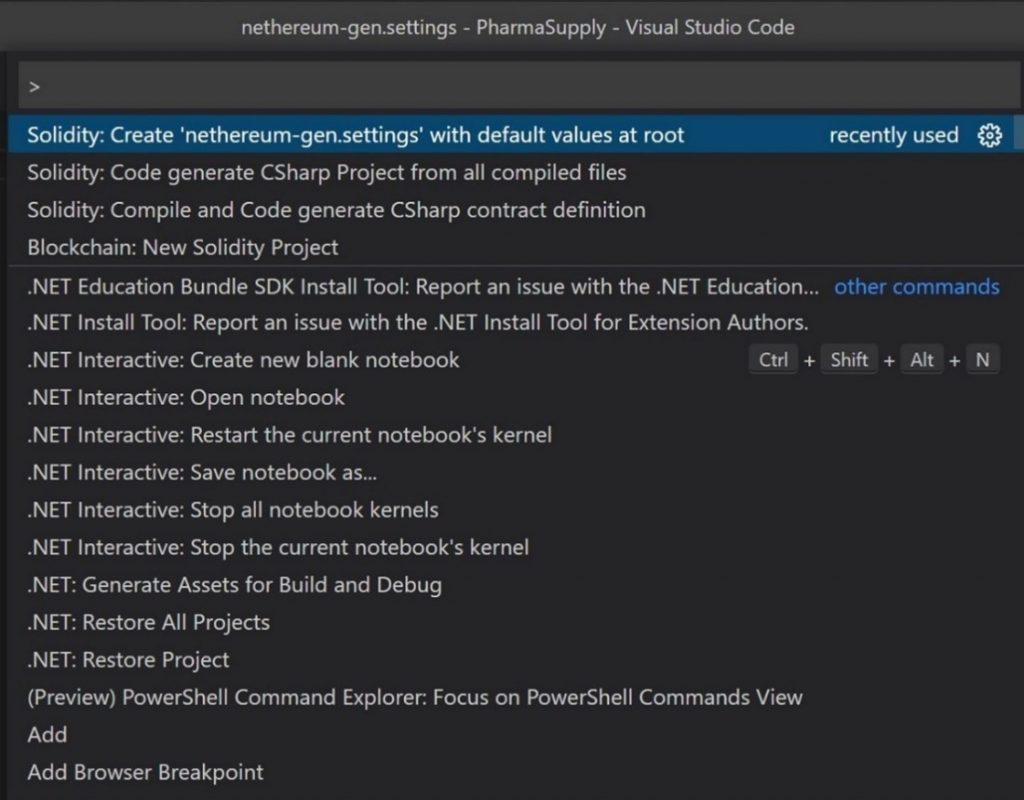
a. Starting from your opened solidity project on visual studio code, press the F1 key and type “solidity” to narrow down the list of executable operations to only show the available solidity extension operations. Scroll through the list and select the item titled “Solidity: Create nethereum-gen-settings with default as root.”
b. This will create a file named nethereum-gen-settings with its content similar to the image shown below:
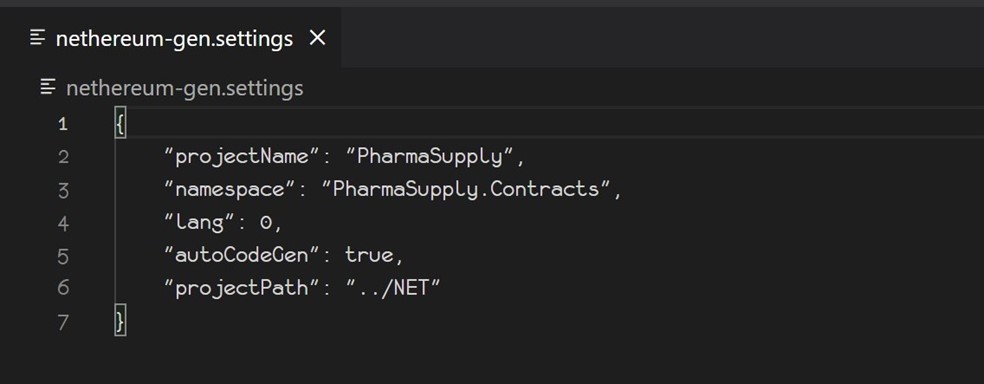
lang denotes programming language which has the possible values 0,1 and 2 which map to C#, vb.NET and F# respectively.
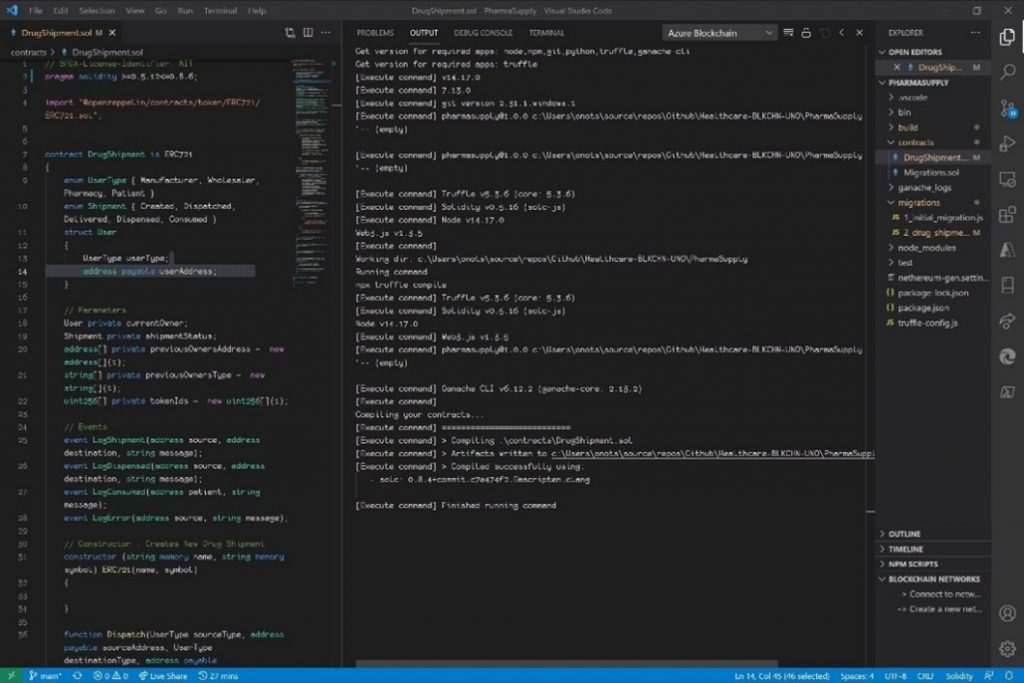
c. Next, right-click on one of your smart contracts in my case sol file. Left click on Build contracts. This will take a while and the progress can be monitored on the Output Tab on visual studio code to ensure successful compilation.
d. Again, press F1, type “solidity” and search for and select “Solidity:
Code generate CSharp project from all compiled files”.
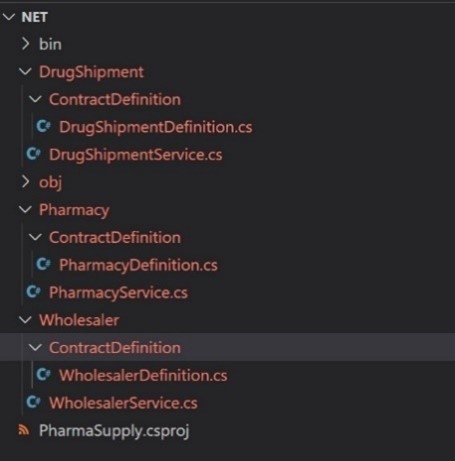
e. Once completed, head over to the project path and you will see the generated code arranged in several folders with a similar nested structure as illustrated below:
STAGE 2: Uno platform cross-targeted library creation using the above generated code.
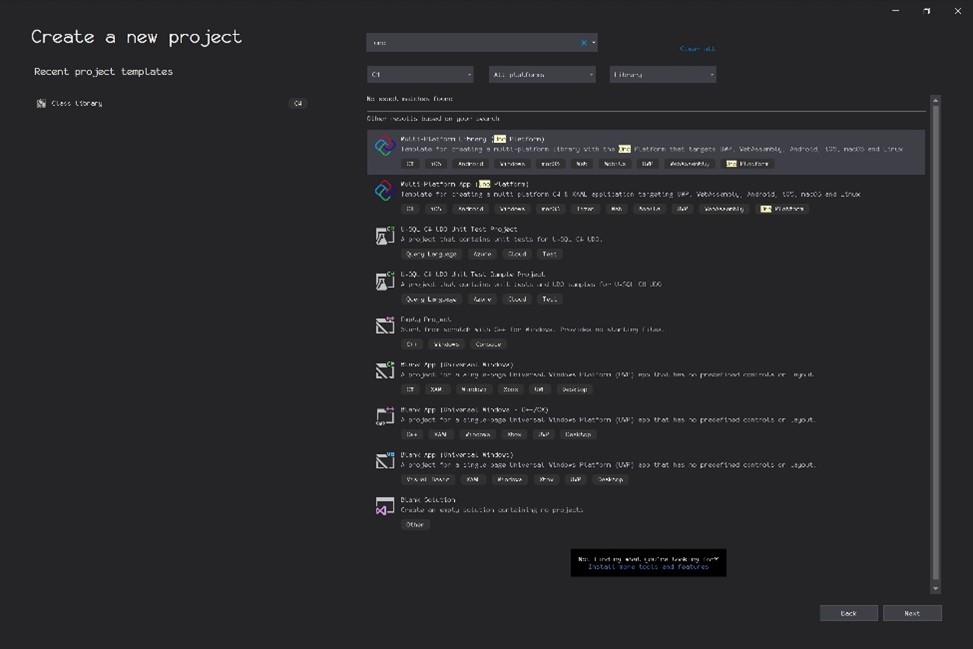
This stage requires you to have installed the Uno Platform Solution Templates for Visual Studio.
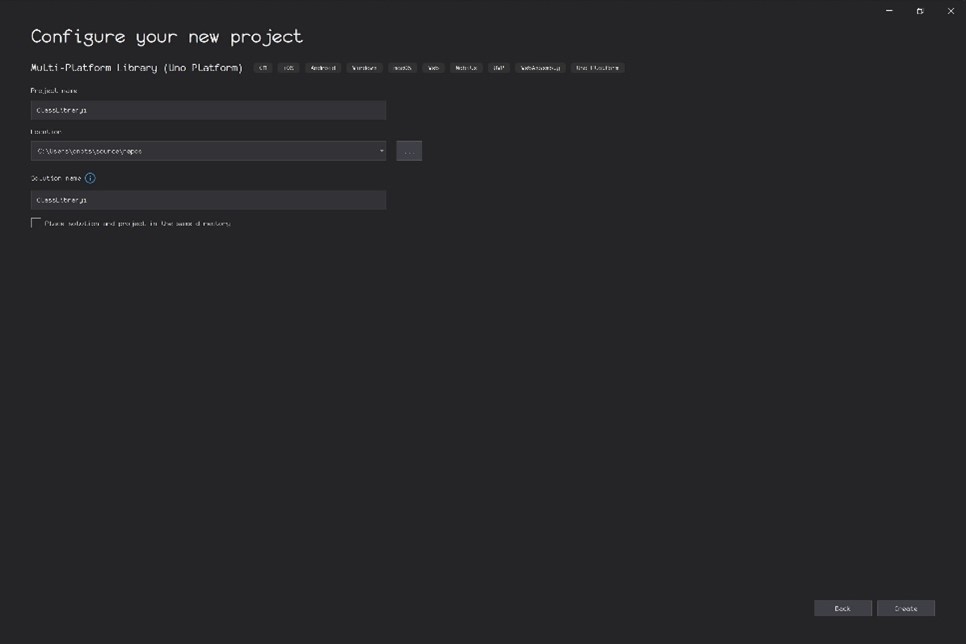
a. Running a new instance of Visual Studio, create a new project making sure to search and select the Multi-platform Library (Uno Platform). Name your project with the name set in the nethereum-gen-settings projectName field and click on the Create button.
b. Once the project is created, copy the generated folders and C# codes obtained from stage 1 into your project and build it.
c. Some errors will occur and for the Drug shipment example, the table below itemizes the description of the common errors and now to fix them.
| S/No | Error | Solution |
| 1. | Type or namespace not found (missing using directive or assembly reference | Restore NuGet packages. If this does not work check for and install the specific packages missing i.e., Netherereum.Web3 |
| 2. | Keywords used as variable names (Invalid expression terms) | Rename the variable(s) in question. |
| 3. | Function overloading errors (Type already defines a member with similar parameters) | Rename member variable or function. |
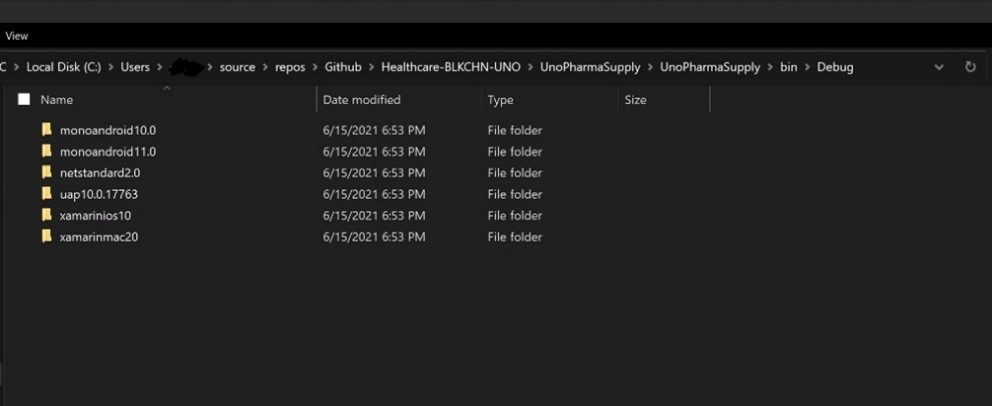
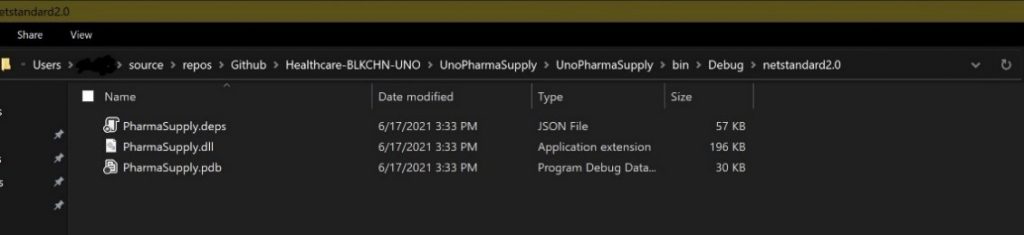
d. Upon a successful build, in your Debug and/or Release folder,
you will find folders mapping to each targeted platform and inside these folders you will see the dll for the specific platform.
Okay! Now, we’re going to use the previously created libraries in an Uno Platform multi-targeted application.
Uno Platform Solution Templates is an extension for the Visual Studio 2019 IDE that allows you to build cross platform applications that target several major platforms like Android, iOS, MacOS, Windows and Web Assembly.
Our custom-made Uno Platform cross-targeted library relies on the Nethereum NuGet package. Nethereum is an open-source .NET integration library for blockchain technology. Nethereum allows .NET developers write smart contracts, cryptographic wallets and decentralized applications for the Ethereum blockchain network.
Before you deploy or test your application, you need to make sure your Ganache client is running. You will need test accounts to interact with in your application.
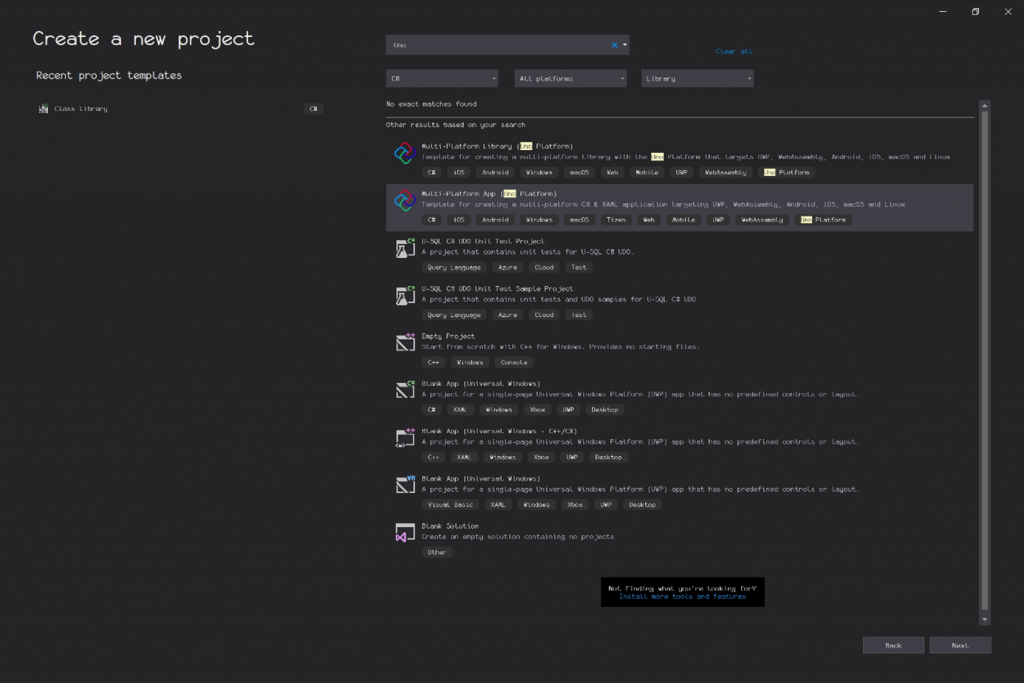
To create an Uno Platform cross platform application, you need to make sure you have the Uno Platform Solution Templates installed in Visual studio. Start Visual studio and select create a new project. Type “Uno” to narrow down the list of templates available. Then select “Multi-Platform App (Uno Platform)”. Click next and name your app accordingly.
This article comes with an accompanying demo application which you can run and test the several functions exposed by your Uno platform cross-targeted library.
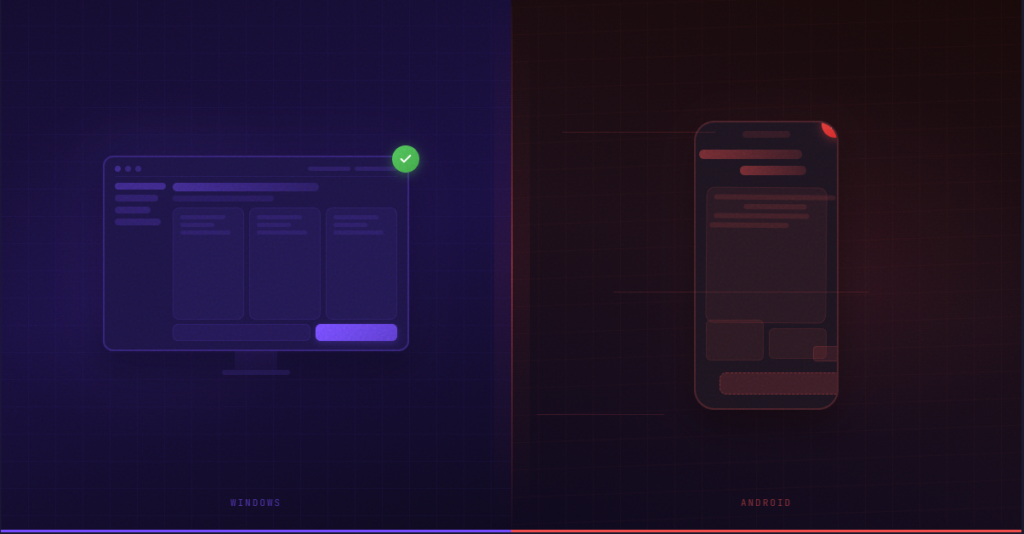
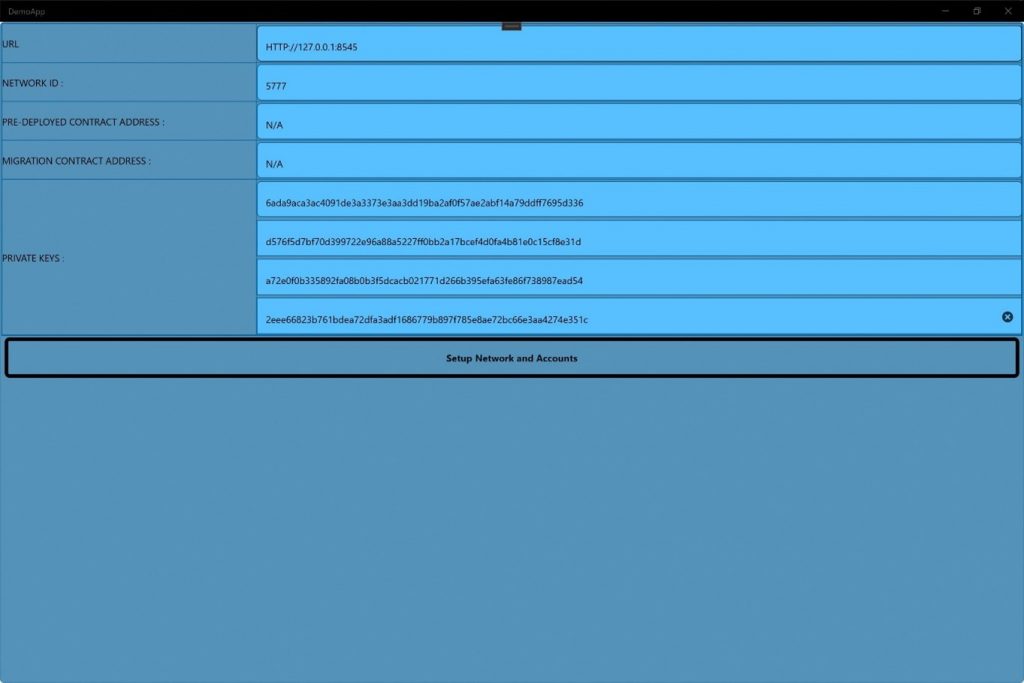
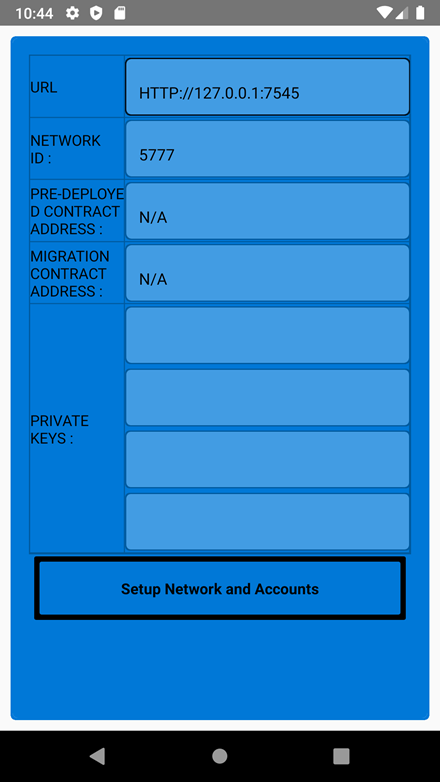
When you build and run the app, you will be presented with a page that allows you to input test credentials similar to the images illustrated below (Windows and Android):
Behind the scenes, Test account objects and services are created and passed on the Tabbed page which will come next.
Code snippet for the Credentials MainViewModel.

public class MainViewModel

{

        #region Properties


        public string DrugShipment { get; set; }

public string Migrations { get; set; }

        public string Url { get; set; }

        public string NetworkId { get; set; }


        public AccountAddresses AccountAddress { get; set; }

        public AccountKeys AccountKeys { get; set; }


        public Accounts Accounts { get; set; }


        public Web3s Web3s { get; set; }


        #endregion


        public MainViewModel()

        {

            Url = "HTTP://127.0.0.1:7545";

            NetworkId = "5777";

            DrugShipment = "N/A";

            Migrations = "N/A";

            AccountAddress = new AccountAddresses();

            AccountKeys = new AccountKeys();

            Accounts = new Accounts();

            Web3s = new Web3s();

        }


        public SetUp Setup()

        {

            Accounts.one = new Account(AccountKeys.one);

            Accounts.two = new Account(AccountKeys.two);

            Accounts.three = new Account(AccountKeys.three);

            Accounts.four = new Account(AccountKeys.four);


            Web3s.one = new Web3(Accounts.one, Url);

            Web3s.two = new Web3(Accounts.two, Url);

            Web3s.three = new Web3(Accounts.three, Url);

            Web3s.four = new Web3(Accounts.four, Url);


            return new SetUp { Accounts = Accounts, DrugShipment = DrugShipment,  Migrations =
We can now test several public functions written in our smart contracts.
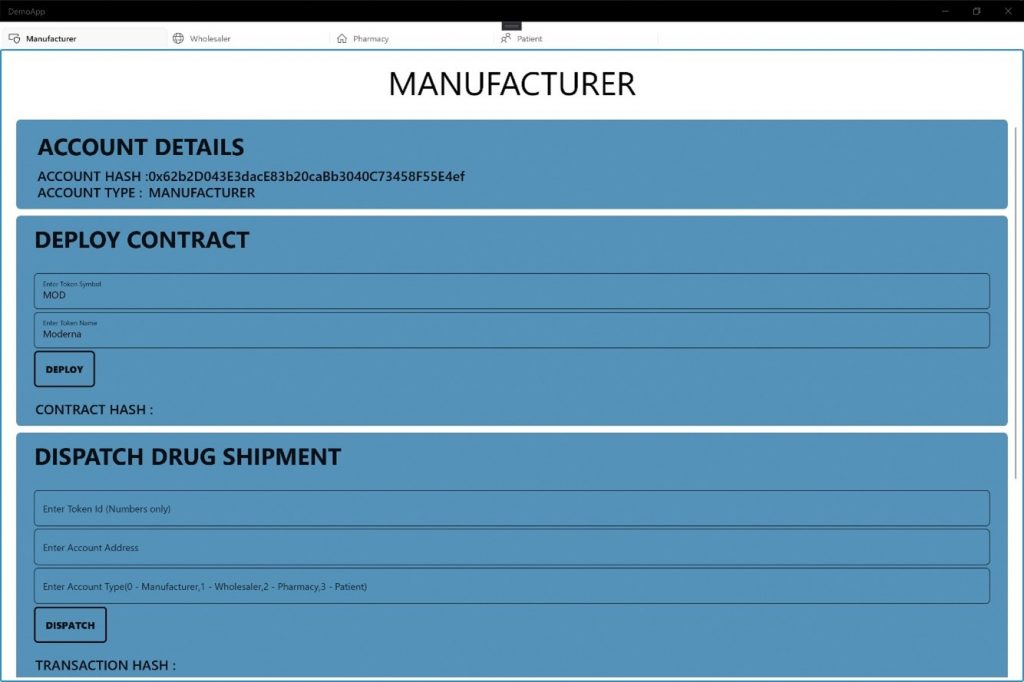
- Deploy DrugShipment Contract as a Manufacturer:
To deploy a drug shipment as a manufacturer, use the DrugShipmentService static class with the method DeployContractAndGetServiceAsync which takes 2 parameters:- Web3
- DrugShipmentDeployment
The DeployCommand above is bound to the Deploy button in the Manufacturer’s tab illustrated below.
public async Task DeployCommand(DrugShipmentDeployment deployment)
{


DrugShipmentService = await  DrugShipmentService.DeployContractAndGetServiceAsync(SetUp.Web3s.one, deployment);


}
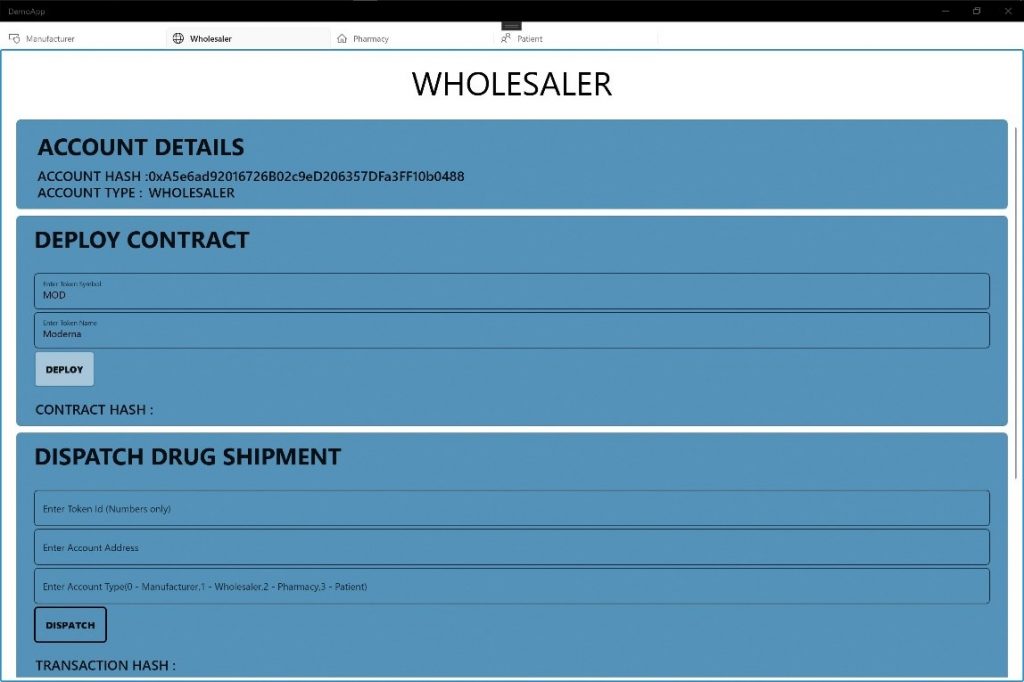
- Deploy Wholesaler Contract as a Wholesaler:
To deploy a Wholesaler drug shipment as a Wholesaler, use the WholesalerService static class with the method DeployContractAndGetServiceAsync which takes 2 parameters:
- Web3 object
- WholesalerDeployment object
public async Task DeployCommand(WholesalerDeployment deployment)
{
DrugShipmentService = await WholesalerService.DeployContractAndGetServiceAsync(SetUp.Web3s.three, deployment);
}
The DeployCommand above is bound to the Deploy button in the Wholesaler’s tab illustrated below.
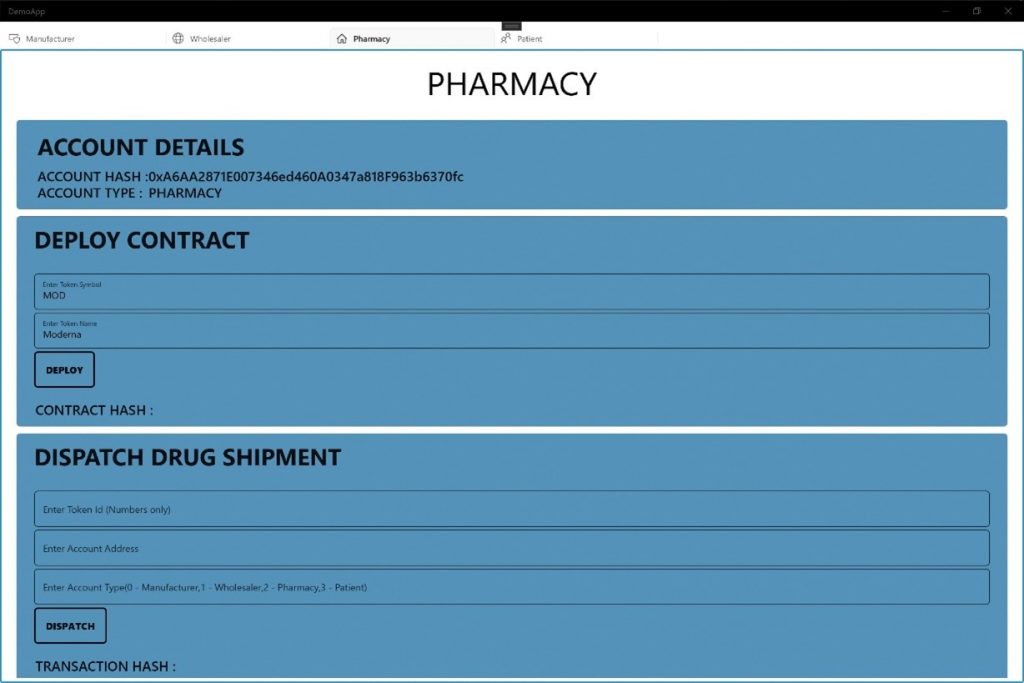
- Deploy Pharmacy Contract as a Pharmacy:
To deploy a Pharmacy drug shipment as a Pharmacy, you just need to use the PharmacyService static class with the method DeployContractAndGetServiceAsync which takes 2 parameters:
i. Web3
ii. PharmacyDeployment object.
public async Task DeployCommand(PharmacyDeployment deployment)
{
DrugShipmentService = await PharmacyService.DeployContractAndGetServiceAsync(SetUp.Web3s.three, deployment);
SetUp.Service = DrugShipmentService;
}
The DeployCommand above is bound to the Deploy button in the Pharmacy’s tab illustrated below.
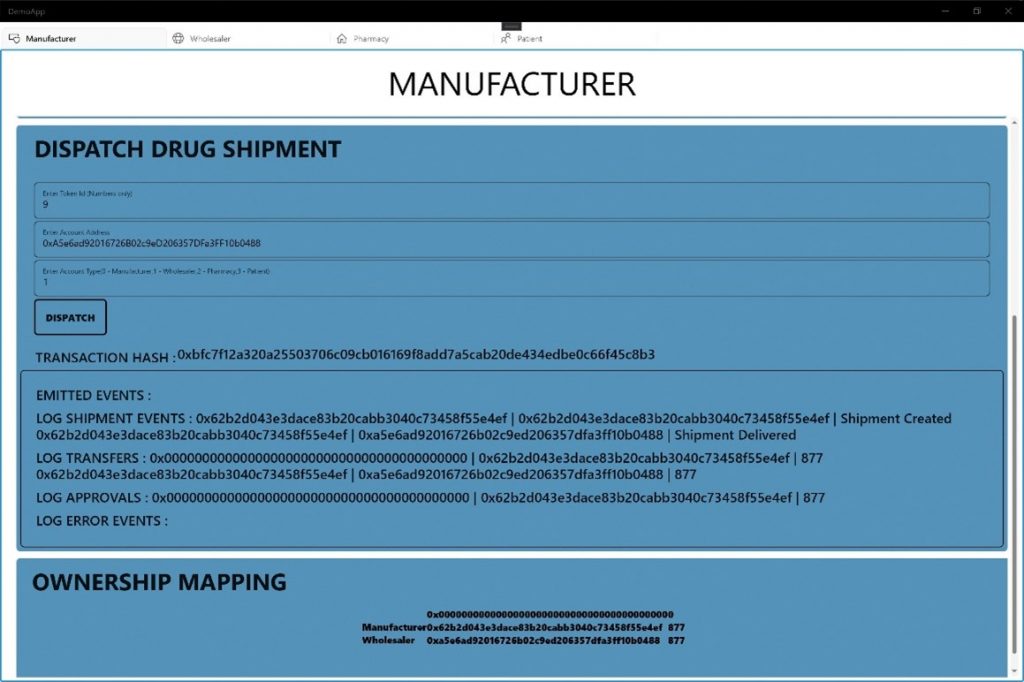
- Dispatch Drug shipment from Manufacturer to Wholesaler:
When you dispatch a drug shipment from a Manufacturer to a Wholesaler, you do this with the DispatchRequestAndWaitForReceiptAsync() method which takes a DispatchFunction object as a parameter. This method tells the DrugShipment Service to create a shipment with a unique token id and dispatch it to a given Wholesaler. If successful, 3 events are emitted: Approval, Transfer and LogShipment events and if not successful, a LogError event is emitted.
public async Task DispatchCommand(DispatchFunction fxn)
{
DispatchReceipt = await DrugShipmentService.DispatchRequestAndWaitForReceiptAsync(fxn);
GetDispatchEvents();
}
The DispatchCommand above is bound to the Dispatch button in the Manufacturer’s tab illustrated below.

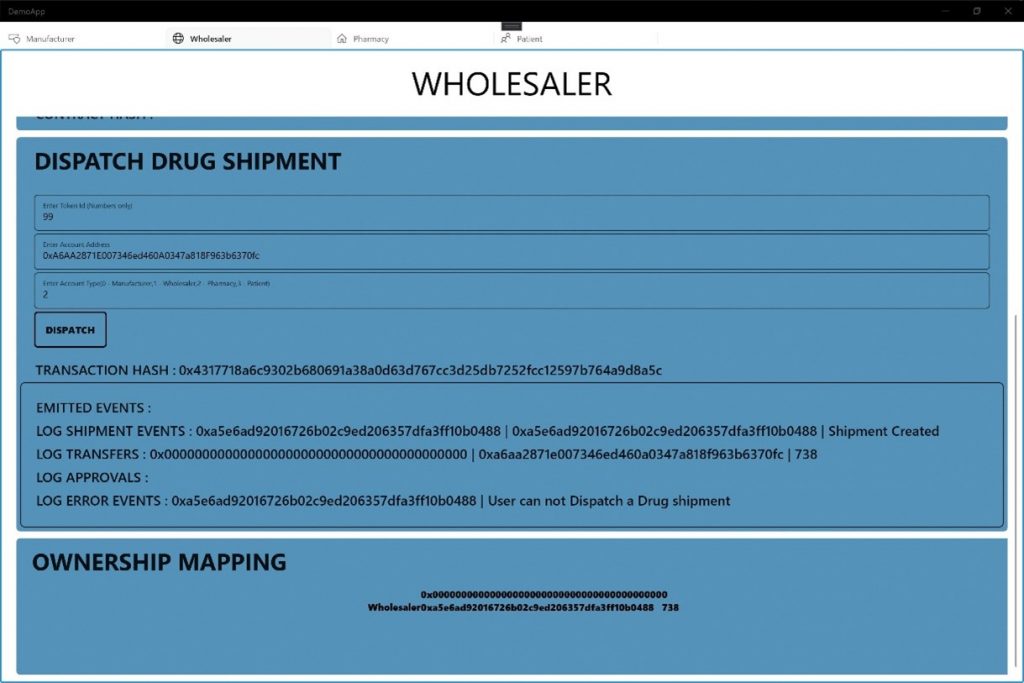
- Dispatch Drug shipment from a Wholesaler to a Pharmacy:
In a similar fashion, when you dispatch a drug shipment from a Wholesaler to a Pharmacy, you do this with the DispatchRequestAndWaitForReceiptAsync() method which takes a DispatchFunction object as a parameter. This method tells the Wholesaler Service to create a shipment with a unique token id and dispatch it to a given Pharmacy. If successful, 3 events are emitted: Approval, Transfer and LogShipment events and if not successful, a LogError event is emitted.
public async Task DispatchCommand(DispatchFunction fxn)
{
DispatchReceipt = await DrugShipmentService.DispatchRequestAndWaitForReceiptAsync(fxn);
GetDispatchEvents();
}
The DispatchCommand above is bound to the Dispatch button in the Wholesaler’s tab illustrated below.
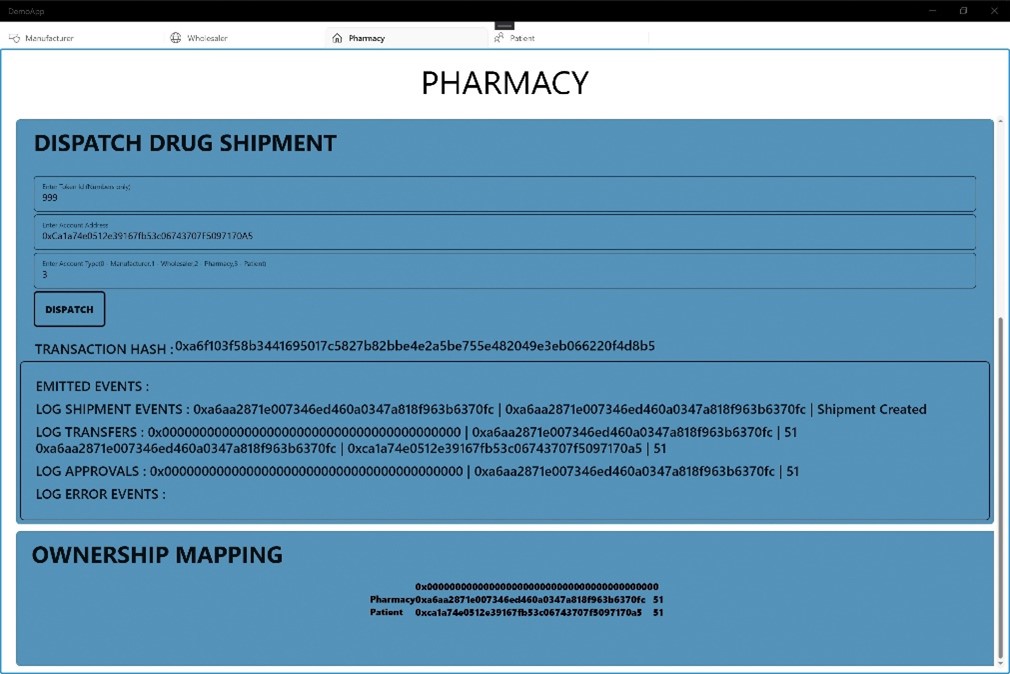
- Dispatch Drug shipment from Pharmacy to Patient:
When you dispatch a drug shipment from a Pharmacy to a Patient, you do this with the DispatchRequestAndWaitForReceiptAsync() method which takes a DispatchFunction object as a parameter. This method tells the Pharmacy Service to create a shipment with a unique token id and dispatch it to a given Patient. If successful, 3 events are emitted: Approval, Transfer and LogShipment events and if not successful, a LogError event is emitted.
public async Task DispatchCommand(DispatchFunction fxn)
{
DispatchReceipt = await DrugShipmentService.DispatchRequestAndWaitForReceiptAsync(fxn);
GetDispatchEvents();
}
The DispatchCommand above is bound to the Dispatch button in the Pharmacy’s tab illustrated below.
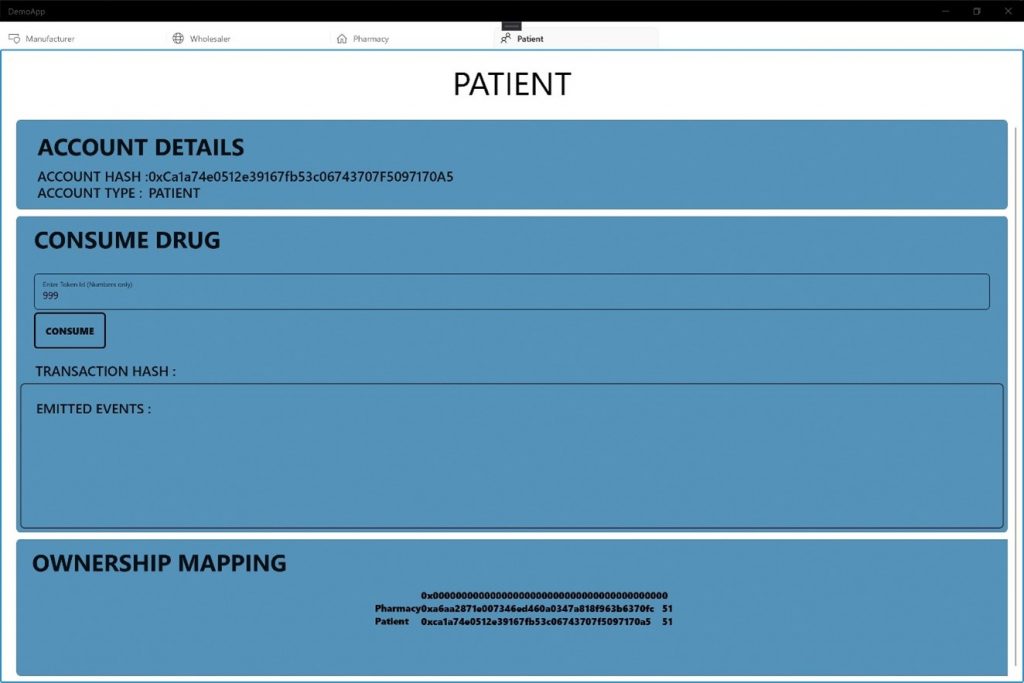
- Consume Drug as a Patient:
The Patient whom owns a specific drug shipment can consume the drug by calling the ConsumeRequestAndWaitForRecieptAsync() method attached to the PharmacyService from which the dispatch function was executed.
public async Task ConsumptionCommand(ConsumeFunction fxn)
{
try
{
ConsumptionReceipt = await DrugShipmentService.ConsumeRequestAndWaitForReceiptAsync(fxn);
GetDispatchEvents();
}
catch (Exception exception)
{
Console.WriteLine(exception.Message);
}
}
The ConsumptionCommand above is bound to the Consume button in the Patient’s tab illustrated below:
And we’re done! In the exercise above, we have seen and explained how we consumed our Uno platform library in a demo application. You can get all of the code for this exercise here.
In a real-world scenario, Several apps might need to be built or at least a form of User and Role management will need to be implemented in an app to distinguish between patient features and views versus manufacturer, wholesaler and pharmacy features and views. Happy coding!