Credit: This article originally appeared at https://blog.mzikmund.com/2020/01/custom-fonts-in-uno-platform/, written by Uno community champion Martin Zikmund.

Custom fonts are super useful to make your application match company brand and to create vector-based font icons. Let’s take a look at how we can use custom fonts in UWP, Android, iOS, and WebAssembly with Uno Platform!
Get a font (or create one)
There are many on-line sources for free custom fonts, including:
Always make sure the license for the font allows packaging it with your application.
We can also create a new font. This is especially useful for icon fonts – we can choose a custom set of vector-based icons, compile them into a font and use this for iconography in your app. Niels Laute wrote an excellent article on creating custom icon fonts for apps. I highly recommend it!
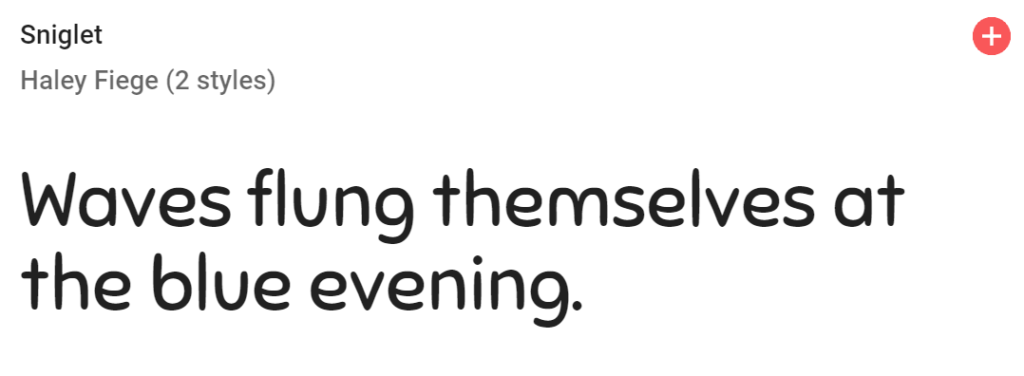
For this article, I have chosen a font called Sniglet, which is available on Google Fonts:
Font formats
We require two different font formats – TrueType .ttf for UWP, Android and iOS, and Web Open Font Format (.woff) or its newer version (.woff2) for WebAssembly (WASM). All current versions of major browsers which support WASM support .woff2 as well.
If the font we have chosen does not include a .woff version, we can use one of the many on-line converters that allow us to convert font from .ttf to .woff or .woff2 – for example here, here or here. Before converting, ensure the EULA of the font allows such conversion. If not, try to contact the font author and ask for the .woff variant.
Uno Platform project
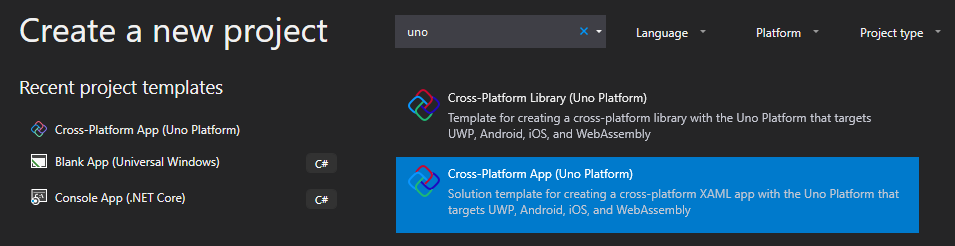
We create our Uno Platform project using the Visual Studio Cross-Platform App (Uno Platform) template. For full details and Uno Platform installation instructions, see the official gettings started docs.
Please note, that to make WASM custom fonts work properly, we need to update the Uno NuGet packages to version 2.1.0-dev.693 or later. This release contains a bugfix required for proper WASM support.
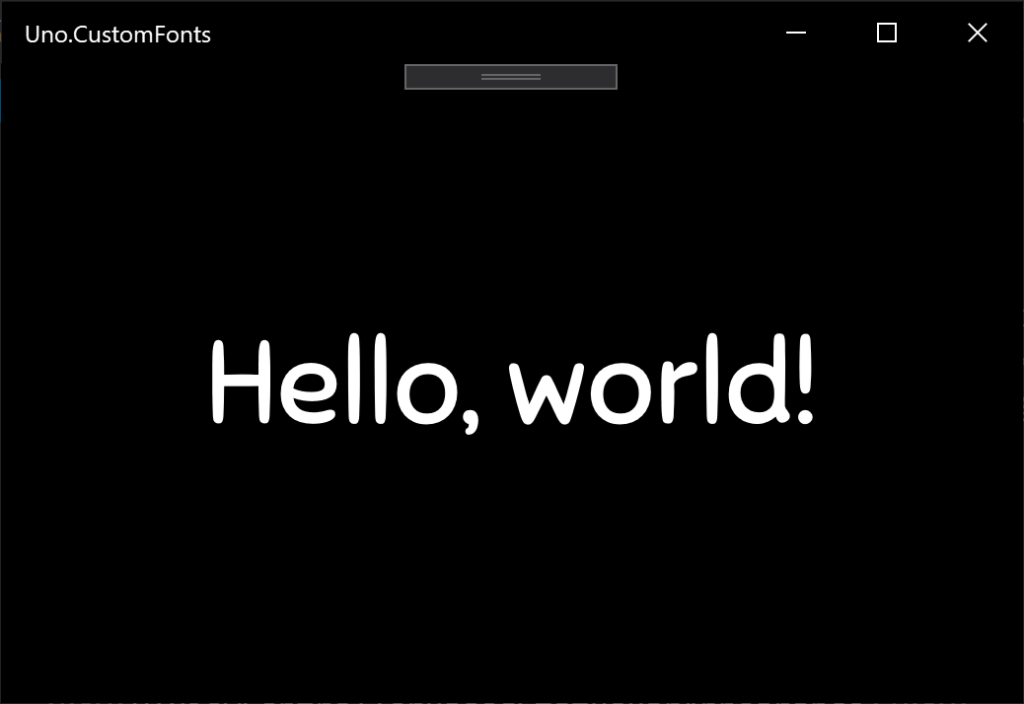
We open the MainPage.xaml file in the Shared project. The default template already contains a “Hello, World!” TextBlock, so we change it to use our soon-to-be-included custom font:
https://gist.github.com/MartinZikmund/691fbd3e0c7fd81071ae8a81307768b5
Add font to platform projects
Although we could add a copy of the font file to each of the projects, this is a bit impractical – we end up with separate copies of the same .ttf file, which means we would need to manually replace each of those copies each time we update the font – that’s tedious. A better solution to add the file to a separate folder in the solution and then refer to it by a relative path.
We add a fonts folder in the root folder of our Uno Platform solution and copy the .ttf file there:

UWP, Android and iOS apps will use this single file. WASM requires a bit different approach, as we shall see later.
Add font to UWP
In the UWP project, we add a new Assets folder and inside a Fonts folder. Then we right-click and choose Add > Existing Item… or press the Shift + Alt + A keyboard shortcut.

Go to the fonts folder in the root of the solution and highlight the .ttf file in the file explorer but do not double-click or click Add yet! Instead, we click on the little arrow on the right side of the Add button, and from the drop-down menu we select Add As Link.
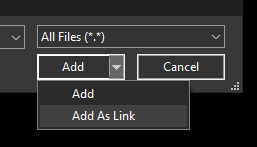
The font file should appear in Solution Explorer with a small blue arrow in the lower-right side of its icon – this signifies that it is just a link. We can confirm this by opening the .csproj file in a text editor:
https://gist.github.com/MartinZikmund/d7ba1927d6012c9c5f5ab683c1ee1ecb
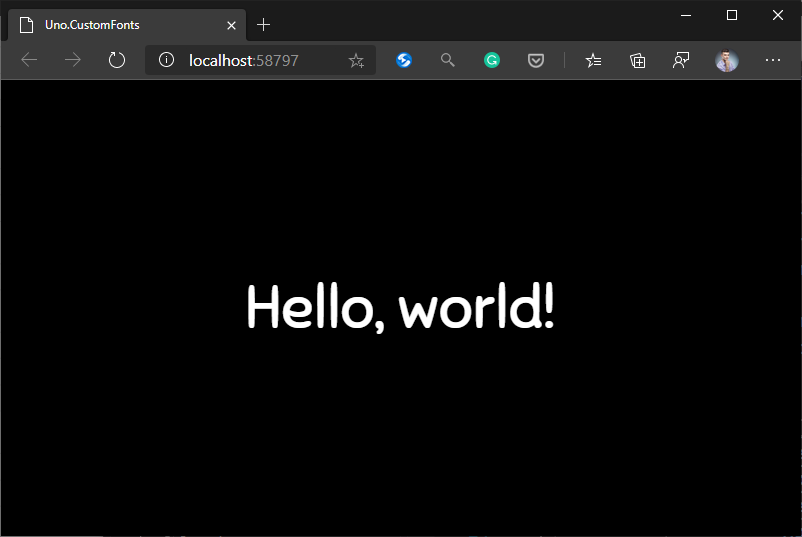
We can launch the app to see our custom font applied:
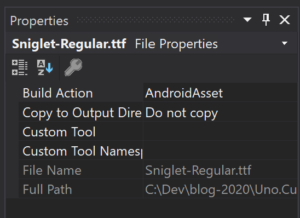
Add font to Android
The steps for Android are the same as for UWP. There should already be a Assets/Fonts folder in the Android project. Add the .ttf as a link as described above. When done, make sure the font’s Build Action is properly set to AndroidAsset in the Properties window:
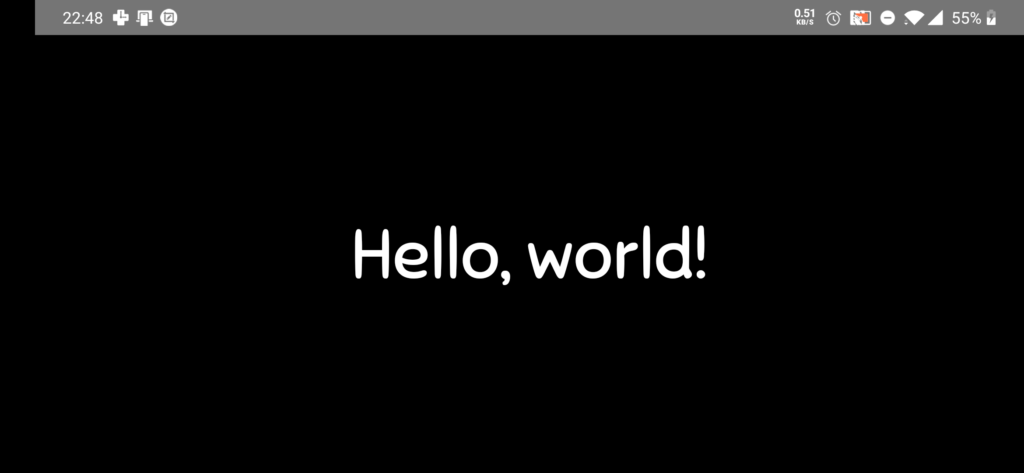
Now let’s run our application!
Add font to iOS
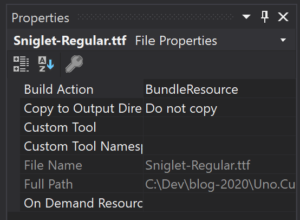
Again we start the same way as for UWP and add the font as a link. This time, however, in the Resources/Fonts folder of the iOS solution:
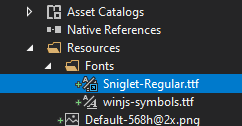
Also, ensure the Build Action is set to BundleResource:
iOS also requires us to add the font to the almighty Info.plist file. Right-click the Info.plist file and select View code… or press F7.
Scroll down in the file to locate the UIAppFonts section. We add our new font in the <array>:
https://gist.github.com/MartinZikmund/464cda2f3267ca26162ed6ff829061be
With this, we are ready to launch our app on iOS. This time I used the light theme for a change 🙂 .

Add font to WebAssembly
The final piece of our puzzle requires a bit more work. To explain why, we now make a small detour into how custom fonts work in Uno Platform for WASM.
When custom fonts are declared in CSS using a @font-face rule, they are usually loaded asynchronously – when browser encounters the rule the first time, it starts downloading applies it after download finishes. This means the page will first show a fallback font on slower internet connections. In the case of Uno Platform it is even more tricky, as it needs the fonts to be ready to determine the right sizes of XAML elements during the layout phase. Hence, when the font is not available, the calculations are necessarily off, and as a result, the application can’t look right. This problem is tracked in this GitHub issue and even mentions a workaround.
An alternative workaround, which we will use, is to embed the font directly in the CSS with a data URI. Although embedding the font increases the size of the CSS file and is a bit less convenient to maintain, but solves the problem well, as the font downloads synchronously.
A data URI in CSS uses Base64 encoding to represent the full contents of a file (in this case, a .woff file) as a URI. To do this, you can use one of the font conversion tools mentioned above, or any on-line tool available for this purpose. A simple search for “file to Base64” yields hundreds of results, for example, here. Finally, we can even perform the encoding with a simple PowerShell script:
https://gist.github.com/MartinZikmund/9073a19501aaa13c93e6be7b9f54e3a6
We copy the whole encoded Base64 font into the clipboard and return to Visual Studio. Within the WASM project, we find the WasmCSS folder, which contains file Fonts.css. We add our new font there:
https://gist.github.com/MartinZikmund/a1c638dc008a7a8805a3d79d43e494eb
We paste our Base64 font in place of the three dots (…) in the code snippet. For the font-family property, we use the same name as in XAML – more specifically name after the hash character (#) – in our case Sniglet.
And that’s it! Our custom font now works across all platforms!
Source code
Example source code for this article is available here on my GitHub.
Summary
As we have seen, it is super simple to use custom fonts in our Uno Platform applications. The real beauty of it is that the resulting app has one universal XAML, which works the same way regardless of which platform it runs on.