We are happy to announce the preview of Uno Platform support for Visual Studio Code, following the progress made by the .NET team on the Visual Studio Code WebAssembly debugger integration.
This blog will walk you through the set-up process for building and debugging WebAssembly apps with Uno Platform wherever Visual Studio Code runs – Windows, Linux or macOS. Also, it is important to note that by using Visual Studio Code, you will be able to create or edit only your Web (WebAssembly) Uno Platform projects.
About Uno Platform
For those new to Uno Platform – it enables for creation of single-source C# and XAML apps which run natively on iOS and Android, and Web via WebAssembly. Uno Platform is Open Source (Apache 2.0) and available on GitHub. To learn more about Uno Platform, see how it works, or create a small sample app.
Create a new Uno Platform project for WebAssembly
You can view the up-to-date version of this content on our documentation site.
1. Launch Code, then in the terminal type the following to install the Uno Platform templates:
dotnet new -i Uno.ProjectTemplates.Dotnet::2.2.0-dev.494
Note that this command was updated since the original publication of this article. If the command below did not work, try re-running it to update to the latest templates. You can see the latest stable release at Uno Platform release history.
2. In the terminal type the following to create a new project:
dotnet new unoapp -o MyApp -ios=false -android=false -macos=false -uwp=false --vscodeWasm
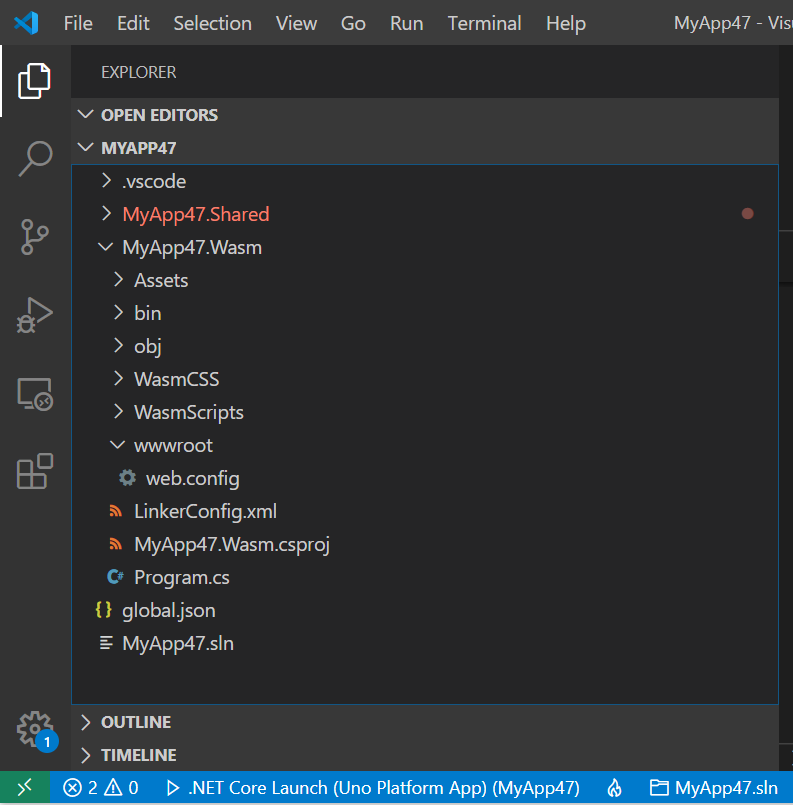
This will create a solution that only contains the WebAssembly platform support. You should be seeing a screen like this in your Visual Studio Code.
Prepare the WebAssembly application for debugging
1. Install the C# extension and the JavaScript Debugger (Nightly) extension with the debug.javascript.usePreview setting set to true (File / Preference / Settings, search for Use preview).
2. Open Code using
code ./MyApp
3. Code will ask to restore the nuget packages
Modify the template to create a small “Hello World” app.
1. In MainPage.xaml, replace the Grid content with the following:
<StackPanel>
     <TextBlock x:Name="txt"
                Text="Hello, world!"
                Margin="20" FontSize="30" />
     <Button    Content="click"
                Click="OnClick" />
</StackPanel>
2. In your MainPage.xaml.cs, add the following method:
public void OnClick(object sender, object args)
{
     var dt = DateTime.Now.ToString();
     txt.Text = dt;
}
Run the sample Application
1. Open the Debug tab in code
2. In the Run combo box, start the “.NET Core Launch (Uno Platform App)”
3. Once the build has finished you can Ctrl+Click on the http://localhost:5000 url in the build output
This is what you should see:

Run and Debug the sample application
1. Starting the app with the WebAssembly debugger is a two-step process:
i. Start the app first using the “.NET Core Launch (Uno Platform App)” launch configuration
ii. Then start the browser using the “.NET Core Debug Uno Platform WebAssembly in Chrome” launch configuration (requires Chrome). To use the latest stable release of Edge instead of Chrome, change the type of the launch configuration in .vscode/launch.json from pwa-chrome to pwa-msedge
2. Place a breakpoint in the OnClick method
3. Click the button in the app, and the breakpoint will hit

You’ll notice that the context variables are available, and call stack frames view are also showing the C# frames. You can click on any of those and through the magic of Source Link, the C# code of Uno or Mono will be shown in the editor window, for the currently running version of the binaries.
Modifying an Existing Uno Platform App (WebAssembly head only)
With your sample application running and your environment set up you are now in position to edit your existing Uno web app. For the purpose of this exercise we will modify the Uno platform Getting Started app.
1. Clone the https://github.com/unoplatform/Uno.GettingStartedTutorial
2. Use the same command line above to create a project with the same name as your current project, in a different location.
3. Once created, copy the generated .vscode folder next to your .sln file
4. Update the Uno.UI package version to 2.2.0-dev.489 or later version
5. Update the Uno.Wasm.Bootstrap package to 1.2.0-dev.29 or later version
Note: the package version was updated to reflect a Linux a macOS deployment issue.
6. Add the following item in the same item group as the other nuget packages:
<PackageReference Include="Uno.Wasm.Bootstrap.DevServer" Version="1.2.0-dev.29" PrivateAssets="all" />
7. In your Wasm project file, if you had a <DotNetCliToolReference … /> line, remove it
8. You should now be in the same configuration as the generated template files.
Enjoy using VS Code and Uno!
Jerome Laban, on behalf of Uno Platform Team